Uneven drywall seams can be a frustrating and unsightly problem in your home. They can make a room look unfinished and can even affect the overall stability of your walls. Fortunately, with the right tools and techniques, you can easily fix uneven drywall seams and restore the appearance of your walls. In this article, we will discuss the causes of uneven drywall seams, the tools and materials needed for repair, safety precautions to take, and provide a step-by-step guide to fixing them.
Understanding the Causes of Uneven Drywall Seams
Before we delve into the process of fixing uneven drywall seams, it’s important to understand the various causes behind them. By identifying and addressing the underlying issues, you can ensure a more effective and lasting repair.
The Role of Incorrect Installation
In many cases, uneven drywall seams are caused by incorrect installation techniques. This can include anything from uneven application of joint compound to improper taping and mudding. It’s essential to ensure that the initial installation is done properly to avoid future problems.
When it comes to joint compound application, it’s crucial to achieve a smooth and consistent layer. Uneven application can result in visible seams that are difficult to hide, even with sanding and painting. Additionally, improper taping and mudding techniques can lead to weak seams that are prone to cracking and separating over time.
Professional drywall installers know the importance of using the right tools and techniques to achieve a seamless finish. They carefully measure and cut the drywall sheets, ensuring that they fit snugly against each other. They also apply joint compound evenly and feather out the edges to create a smooth transition between panels.
Impact of Moisture and Temperature Changes
Moisture and temperature changes can also contribute to uneven drywall seams. As the drywall expands and contracts with fluctuations in humidity and temperature, the seams can shift and become uneven. This is particularly common in areas with high humidity or drastic climate changes.
In regions with high humidity, such as coastal areas, the moisture in the air can penetrate the drywall, causing it to swell. This swelling can lead to uneven seams as the drywall expands. Similarly, in areas with extreme temperature changes, such as desert regions, the constant expansion and contraction of the drywall can result in visible seams.
To mitigate the impact of moisture and temperature changes on drywall seams, it’s important to properly seal the drywall. Applying a moisture-resistant primer and paint can help create a barrier that prevents moisture from seeping into the drywall. Additionally, using expansion joints or flexible tape in areas prone to significant temperature fluctuations can allow the drywall to move without causing visible seams.
The Effect of House Settling
Another common cause of uneven drywall seams is house settling. Over time, the natural movement of a house can cause the walls to shift slightly, leading to uneven seams. This is more likely to occur in older homes or those built on unstable soil.
House settling can be caused by a variety of factors, including changes in soil moisture, the weight of the structure, and the natural settling of building materials. As the house settles, the walls can shift, causing the drywall seams to become misaligned.
In some cases, house settling can be addressed by reinforcing the structure or stabilizing the soil. However, in situations where the settling is minimal and not causing significant structural issues, repairing the uneven drywall seams may be sufficient.
When repairing drywall seams affected by house settling, it’s important to use flexible joint compound and tape. These materials can accommodate slight movements without cracking or separating. Additionally, adding extra screws or nails to secure the drywall panels can help prevent future shifting and minimize the appearance of uneven seams.
Tools and Materials Needed for Repairing Drywall Seams
Now that we understand the causes of uneven drywall seams, let’s discuss the tools and materials you’ll need to fix them.
Repairing drywall seams requires a careful selection of tools and materials to ensure a successful outcome. Let’s take a closer look at the essential tools you’ll need.
Essential Drywall Repair Tools
To repair uneven drywall seams, you will need a few key tools. These include:
- Utility Knife: A utility knife is an essential tool for cutting through drywall and creating clean edges.
- Drywall Saw: A drywall saw is used to make precise cuts in the drywall, allowing you to remove damaged sections.
- Putty Knife: A putty knife is used for applying joint compound and smoothing out the surface of the repaired area.
- Sanding Block: A sanding block is necessary for smoothing the repaired area and ensuring a seamless finish.
- Taping Knife: A taping knife is used for applying drywall tape and joint compound to reinforce the seams.
- Texture Roller: A texture roller is an optional tool that can be used to match the texture of the existing wall surface.
In addition to these tools, it’s important to have a ladder or step stool for reaching high areas, as well as a drop cloth or tarp to protect your floors from any potential mess.
Now that we’ve covered the essential tools, let’s move on to the materials you’ll need for repairing drywall seams.
Choosing the Right Materials
When it comes to repairing drywall seams, using the right materials is crucial. Here are the key materials you’ll need:
- Joint Compound: Joint compound, also known as drywall mud, is used to fill in the gaps and smooth out the seams. It’s important to choose a high-quality joint compound that is easy to work with and provides a strong bond.
- Drywall Tape: Drywall tape is used to reinforce the seams and prevent future cracking. There are different types of drywall tape available, such as paper tape and self-adhesive mesh tape. Choose the one that suits your preference and project needs.
- Primer: Primer is an essential step in the drywall repair process. It helps to seal the repaired area, provide a smooth surface for paint, and ensure proper adhesion.
It’s important to choose high-quality products that are specifically designed for drywall repair. This will ensure that the repaired seams blend seamlessly with the existing wall surface and provide long-lasting results.
Now that you have a comprehensive list of the tools and materials needed for repairing drywall seams, you’re ready to tackle your project with confidence!
Safety Precautions to Take Before Starting the Repair
Prior to starting the repair process, it’s important to take some safety precautions to protect yourself and your surroundings.
Repairing drywall can be a messy and potentially hazardous task. However, by following a few safety guidelines, you can ensure that the process goes smoothly and without any accidents.
Protective Gear for Drywall Repair
When working with drywall, it’s important to wear appropriate protective gear. This includes safety glasses or goggles, a dust mask or respirator, and gloves. These items will protect you from potential hazards, such as flying debris and dust particles.
Wearing safety glasses or goggles is crucial as it prevents any small particles or debris from entering your eyes. Drywall repair often involves sanding, which creates fine dust particles that can irritate your eyes and cause discomfort.
A dust mask or respirator is essential to protect your respiratory system from inhaling the dust particles that are released during the repair process. These particles can be harmful to your lungs, especially if you have any pre-existing respiratory conditions.
Gloves are another important piece of protective gear as they shield your hands from sharp edges, potential cuts, and any chemicals that may be present in the materials you are using for the repair.
Ensuring a Safe Working Environment
Before you begin the repair, make sure the area is well-ventilated. Open windows or use fans to improve air circulation and reduce the build-up of dust. Proper ventilation is crucial as it helps to minimize the concentration of dust particles in the air, making it safer for you to work in the area.
Additionally, remove any furniture or objects from the area to allow for easy access and prevent accidents. By clearing the space, you create a safer working environment, reducing the risk of tripping over objects or damaging furniture during the repair process.
It’s also a good idea to cover any nearby surfaces or objects that you want to protect from dust or potential damage. You can use plastic sheets or drop cloths to cover furniture, floors, or any other items that may be in close proximity to the repair area.
Furthermore, it is important to ensure that the power supply to the area is turned off. This will prevent any accidental electrical shocks or short circuits while you are working on the repair.
By taking these safety precautions, you can minimize the risk of accidents and injuries during the drywall repair process. Remember, safety should always be a top priority when working on any home improvement project.
Step-by-Step Guide to Fixing Uneven Drywall Seams
Now we will walk you through a step-by-step guide to fixing uneven drywall seams.
Preparing the Wall for Repair
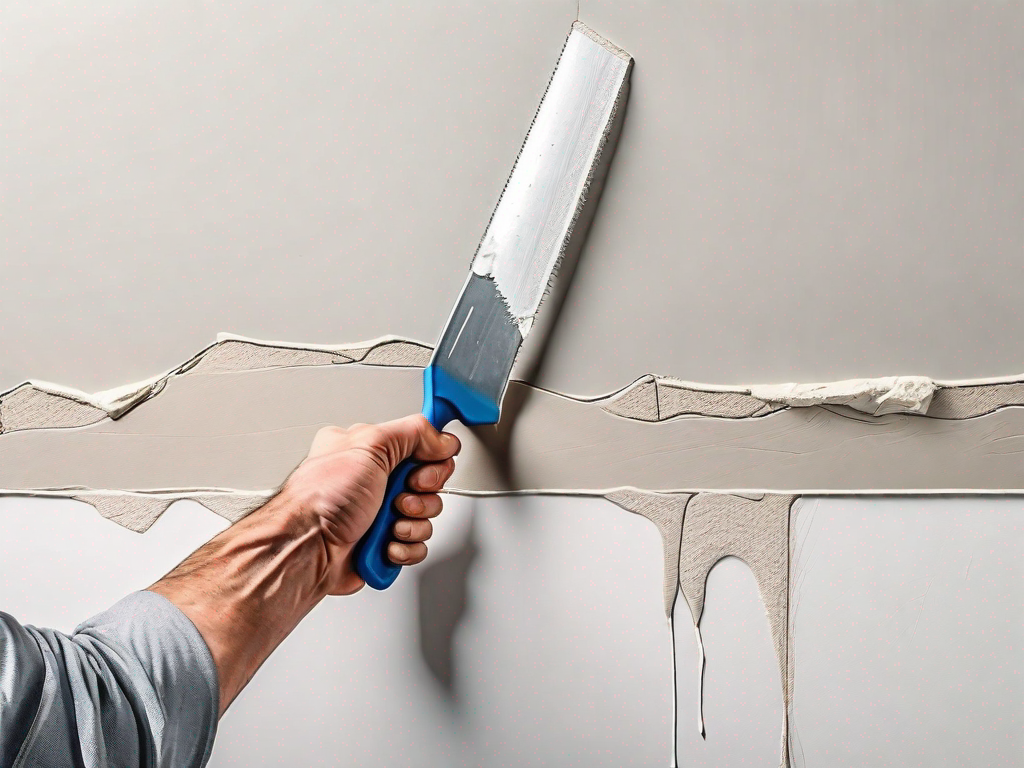
The first step is to prepare the wall for repair. Start by removing any loose or damaged pieces of drywall around the uneven seam. Use a utility knife or drywall saw to cut away any protruding edges. Once the area is clean, apply a layer of joint compound over the seam, using a putty knife or taping knife. Make sure to feather the edges of the compound to create a smooth transition.
Applying Joint Compound
After preparing the wall, it’s time to apply joint compound over the entire seam. Use a taping knife to spread a thin and even layer of joint compound along the length of the seam. Be sure to press firmly so that the compound adheres well to the drywall. Smooth out any excess compound and let it dry according to the manufacturer’s instructions.
Sanding and Priming the Wall
Once the joint compound is completely dry, use a sanding block to sand down any rough areas and create a smooth finish. Be careful not to sand too vigorously, as this can damage the surrounding drywall. After sanding, wipe away any dust with a clean cloth. Finally, apply a coat of primer to the repaired area to ensure proper paint adhesion.
Tips for Achieving a Smooth and Even Finish
Now that you know how to fix uneven drywall seams, here are some tips to help you achieve a smooth and even finish.
Techniques for Smooth Application
When applying joint compound, it’s important to use smooth and consistent strokes. Avoid excessive pressure, as this can create ridges or unevenness. Additionally, feathering the compound along the edges will help to blend it seamlessly with the surrounding drywall.
Importance of Adequate Drying Time
Patience is key when it comes to achieving a smooth and even finish. Allow ample drying time between each step of the repair process. Rushing through the drying process can lead to cracked or uneven surfaces.
By following these steps and tips, you can effectively fix uneven drywall seams and restore the appearance of your walls. Remember to take the necessary safety precautions and use the appropriate tools and materials for the best results. With a little time and effort, your walls will look seamless and professionally finished once again.