The ZR button on your Nintendo Switch is a crucial component for gaming and can greatly enhance your gameplay experience. However, like any other button, it is susceptible to wear and tear over time. In this article, we will guide you on how to fix the ZR button on your Nintendo Switch. We will cover the function of the ZR button, common issues you may encounter, preliminary checks before repair, the necessary tools for ZR button repair, a step-by-step guide to fixing the ZR button, and testing the repaired ZR button.
Understanding the Function of the ZR Button
The ZR button is an essential part of the Nintendo Switch controller and is typically used as a trigger button in games. It plays a crucial role in various types of gameplay, such as shooting, aiming, and interacting with in-game objects. Understanding its function will help you diagnose and fix any issues you may encounter.
The Role of the ZR Button in Gameplay
In many games, the ZR button is used to perform actions like shooting a weapon, throwing objects, or executing special moves. It is often a primary button for in-game interactions, so it is vital to ensure its proper functioning.
When playing a first-person shooter game, for example, the ZR button is commonly used to fire weapons. It gives players the ability to engage in intense battles and take down enemies with precision and accuracy. The pressure-sensitive nature of the ZR button allows for varying degrees of force to be applied, resulting in different firing rates or weapon behaviors.
In adventure or action games, the ZR button is often used to interact with in-game objects. Whether it’s opening doors, activating switches, or picking up items, the ZR button provides players with a seamless way to engage with the game world. It adds depth and immersion to the gameplay experience, making it more interactive and engaging.
Furthermore, the ZR button is crucial for executing special moves or abilities in many games. Whether it’s performing a powerful combo attack in a fighting game or activating a special ability in a role-playing game, the ZR button allows players to unleash their character’s full potential and turn the tide of battle.
Common Issues with the ZR Button
The ZR button can experience various issues, including unresponsiveness, sticking, or being completely non-functional. Some factors that can contribute to these issues are dust accumulation, liquid damage, or physical damage due to accidental drops.
When dust or debris accumulates around the ZR button, it can hinder its responsiveness. This can lead to delayed or missed inputs, affecting gameplay performance. Regular cleaning and maintenance of the controller can help prevent this issue and ensure the ZR button functions properly.
Liquid damage is another common cause of ZR button issues. Accidental spills or exposure to moisture can cause the button to become sticky or unresponsive. In such cases, it is important to clean the affected area thoroughly and allow the controller to dry completely before using it again.
Physical damage, such as dropping the controller or subjecting it to excessive force, can also result in ZR button problems. The internal mechanisms of the button may become misaligned or damaged, leading to issues with its functionality. In such cases, professional repair or replacement may be necessary to resolve the problem.
Understanding the common issues associated with the ZR button can help you troubleshoot and address any problems you may encounter while gaming. By taking proper care of your controller and being aware of potential issues, you can ensure a smooth and enjoyable gaming experience.
Preliminary Checks Before Repair
Before diving into the repair process, it is essential to undertake some preliminary checks to determine the cause of the ZR button issue.
When encountering a malfunctioning ZR button on your Nintendo Switch, it can be frustrating and inconvenient. However, before jumping to conclusions and assuming the worst, it is important to go through a series of preliminary checks to ensure a proper diagnosis and potential solution.
Checking for Software Issues
First and foremost, it is crucial to rule out any software-related problems that may be causing the ZR button issue. This step is relatively simple and can save you time and effort in the long run.
Begin by testing the ZR button in different games. Sometimes, the issue may be isolated to a particular game or software, rather than a hardware problem. By trying out the button in various games, you can determine if the issue persists universally or is specific to a certain game.
If the ZR button functions correctly in other games, it is likely that the problem lies within the software of the game you initially encountered the issue with. In this case, it is recommended to check for any available updates for that specific game. Developers often release patches and updates to address bugs and glitches, including button malfunctions.
Additionally, it is always a good idea to ensure that your Nintendo Switch firmware is up to date. Outdated firmware can sometimes cause compatibility issues and result in button malfunctions. Check for any available system updates and install them if necessary.
Restarting the console may also resolve minor software glitches that could be causing the ZR button issue. Simply power off your Nintendo Switch, wait a few seconds, and then power it back on. This simple step can sometimes work wonders in fixing minor software hiccups.
Identifying Physical Damage
If the ZR button issue persists after performing the software checks mentioned above, it is time to consider the possibility of physical damage. Physical damage can occur due to various reasons, such as accidental drops, excessive force, or wear and tear over time.
To identify physical damage, carefully inspect the ZR button and its surrounding area for any visible signs of damage. Look for cracks, chips, or any loose components that may be affecting the button’s functionality. Sometimes, physical damage may not be immediately apparent, so it is important to examine the button from different angles and lighting conditions.
It is worth noting that physical damage can vary in severity. In some cases, the damage may be limited to the button itself, while in other instances, it may extend to the internal components or circuitry. Identifying the extent of physical damage will help determine the appropriate repair method.
Remember, it is always recommended to exercise caution when inspecting the ZR button and its surroundings. If you are unsure or uncomfortable with performing a visual inspection, it is advisable to seek professional assistance or contact Nintendo’s customer support for guidance.
By going through these preliminary checks, you can gather valuable information about the cause of the ZR button issue, whether it is software-related or due to physical damage. This knowledge will enable you to make informed decisions regarding the next steps in the repair process, ensuring a more efficient and effective resolution to the problem.
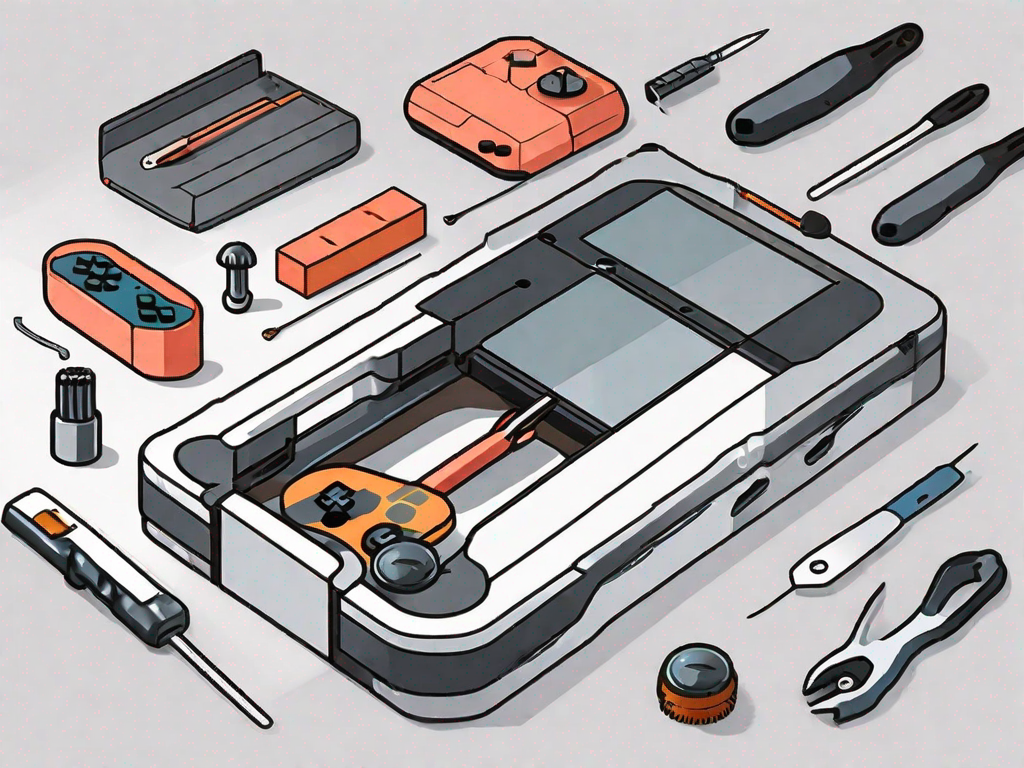
Necessary Tools for ZR Button Repair
Before proceeding with the repair, gather the necessary tools to ensure a smooth and successful process.
Repairing a faulty ZR button on your Nintendo Switch can be a daunting task, but with the right tools and precautions, you can easily fix the issue. In this guide, we will walk you through the necessary tools and safety precautions to take before embarking on the repair journey.
List of Required Tools
- Screwdriver set: A precision screwdriver set is essential for opening up your Nintendo Switch and accessing the internal components. Make sure to choose the right screwdriver size to avoid damaging the screws.
- Spudger or prying tool: A spudger or prying tool will come in handy when detaching the ZR button from the controller. It helps in gently lifting and separating the components without causing any harm.
- Tweezers: Tweezers are useful for handling small parts and connectors during the repair process. They provide precision and control, ensuring you don’t drop or misplace any vital components.
- Replacement ZR button (if needed): If your ZR button is beyond repair, having a replacement button ready will save you time and effort. Make sure to purchase a genuine replacement button to ensure compatibility and optimal performance.
Safety Precautions When Using Tools
While working on your Nintendo Switch, it is important to prioritize safety. Following these safety precautions will help prevent accidents and further damage to your console.
First and foremost, ensure the console is turned off before starting the repair process. This will minimize the risk of electric shock and protect both you and the console from any potential harm.
Detach any power cables or accessories connected to the Nintendo Switch. This step is crucial to avoid any accidental power supply or interference during the repair. It’s always better to be safe than sorry.
Find a well-lit and clean area to work in. Good lighting will help you see the intricate details and components clearly, reducing the chances of making mistakes or damaging other parts of the controller.
Handle the tools with care and caution. Sharp and pointed tools like screwdrivers and spudgers can cause injuries if mishandled. Always grip them firmly but gently, ensuring you have full control over their movement.
Lastly, take your time and be patient. Rushing through the repair process can lead to errors or overlooking important steps. Follow the repair guide diligently, and if you encounter any difficulties, don’t hesitate to seek assistance from professionals or online communities.
By gathering the necessary tools and following the safety precautions, you are now ready to embark on your ZR button repair journey. Remember, a well-repaired button will enhance your gaming experience and ensure you can fully enjoy your Nintendo Switch.
Step-by-Step Guide to Fixing the ZR Button
Now that you have the necessary tools and have completed the preliminary checks, let’s proceed with the step-by-step guide to fix the ZR button on your Nintendo Switch controller.
Opening the Nintendo Switch Controller
Start by carefully removing the screws from the back of the controller using the appropriate screwdriver. Place the screws in a secure container to avoid losing them. Gently pry open the controller using a spudger or prying tool, being mindful not to damage any internal components.
Locating and Assessing the ZR Button
Once the controller is open, locate the ZR button and inspect it for any visible damage or debris that may be causing the issue. Use tweezers or a soft brush to remove any dust or debris gently. At this point, you can also verify if the button’s contacts are properly aligned or if any physical damage is present.
Repairing or Replacing the ZR Button
If the ZR button can be repaired, carefully reposition any misaligned components and ensure they are securely in place. Cleaning the contacts with isopropyl alcohol can also help improve functionality. However, if the button is beyond repair, you may need to replace it with a new ZR button. Follow the manufacturer’s guidelines or consult an expert if needed.
Testing Your Repaired ZR Button
Once the repair or replacement is complete, it is crucial to test the ZR button’s responsiveness and verify its functionality in-game.
Ensuring the Button’s Responsiveness
Close the controller by aligning the front and back halves and carefully snapping them together. Re-insert the screws and tighten them securely. Turn on your Nintendo Switch and navigate to a game that utilizes the ZR button. Test the button’s responsiveness by performing the corresponding actions it is designed for.
Verifying In-Game Functionality
After confirming the ZR button’s responsiveness, test its functionality within the game. Ensure that the button performs as expected and that you can carry out all necessary in-game actions without any issues.
By following this comprehensive guide, you can successfully fix the ZR button on your Nintendo Switch and get back to enjoying your gaming experience without any interruptions. Remember to exercise caution and take your time during the repair process to avoid causing further damage. Now, it’s time to get back to your favorite games with a fully functional ZR button!