Slipped roof tiles can be a common issue that homeowners face. It not only affects the aesthetic appeal of your home but can also lead to more serious problems if left unfixed. Fortunately, you can easily repair slipped roof tiles yourself with the right tools and knowledge. In this step-by-step guide, we will walk you through the process of fixing slipped roof tiles, ensuring that your roof remains sturdy and your home protected.
Understanding Slipped Roof Tiles
Before delving into the repair process, it’s important to understand what slipped roof tiles are and why they occur. Slipped roof tiles refer to tiles that have moved or shifted from their original position, often leaving gaps or exposing the underlying roofing material. This displacement can be caused by various factors, which we will explore further.
What are Slipped Roof Tiles?
Slipped roof tiles occur when the tiles become dislodged from their intended position on the roof. This can happen due to several reasons, such as poor installation, age-related wear and tear, or extreme weather conditions. When the tiles shift, they create openings that allow water to seep through, potentially causing water damage and compromising the integrity of your roof.
Causes of Slipped Roof Tiles
Several factors can contribute to the occurrence of slipped roof tiles. Improper installation is a common cause, often resulting from inexperienced roofers or subpar materials. When the tiles are not properly secured during installation, they are more likely to shift or move over time. This can lead to gaps forming between the tiles, allowing water to penetrate the roof.
In addition to poor installation, harsh weather conditions can also contribute to slipped roof tiles. Strong winds, heavy rain, and intense storms can exert significant force on the roof, causing the tiles to loosen and shift. Over time, this repeated exposure to extreme weather can weaken the grip of the tiles, making them more susceptible to slipping.
Furthermore, age-related deterioration can also play a role in the occurrence of slipped roof tiles. As the roof ages, the materials may degrade, becoming more brittle and prone to movement. The natural settling of the house can also cause the roof structure to shift slightly, which can affect the positioning of the tiles. These gradual changes can lead to the tiles slipping out of place.
It’s worth noting that different types of roof tiles may have varying degrees of susceptibility to slipping. For example, clay tiles are generally heavier and less likely to shift compared to concrete tiles. However, even with more durable materials, factors such as poor installation or extreme weather can still contribute to slipped roof tiles.
In conclusion, slipped roof tiles can occur due to a combination of factors, including poor installation, harsh weather conditions, and age-related wear and tear. Understanding the causes of slipped roof tiles is crucial in determining the appropriate repair methods and ensuring the long-term stability of your roof.
The Importance of Fixing Slipped Roof Tiles
It’s crucial to address slipped roof tiles promptly to avoid potential damage and safety concerns.
Potential Damage from Ignoring Slipped Tiles
Ignoring slipped roof tiles can have serious consequences for your home. The gaps created by the displaced tiles provide an entry point for water, which can lead to leaks, rot, mold growth, and structural damage. These issues can escalate over time, resulting in costly repairs. By fixing slipped roof tiles as soon as possible, you can prevent further damage.
When water seeps through the gaps in slipped roof tiles, it can infiltrate the underlying layers of your roof structure. Over time, this moisture can cause the wooden beams and rafters to weaken and rot. The compromised structural integrity can lead to sagging roofs, which not only pose a safety risk but also require extensive repairs.
Furthermore, the presence of water from slipped tiles can create an ideal environment for mold growth. Mold thrives in damp and dark spaces, and the hidden areas beneath the roof tiles provide the perfect conditions. The growth of mold can not only damage the roof structure but also pose health risks to the occupants of the house. Mold spores can trigger allergies, respiratory issues, and other health problems.
Additionally, the leaks caused by slipped roof tiles can damage the interior of your home. Water can seep through the ceiling, causing unsightly stains and compromising the integrity of the walls. If left unaddressed, these leaks can lead to further damage to your home’s insulation, electrical systems, and even the foundation.
Safety Concerns with Slipped Roof Tiles
In addition to the potential damage to your property, slipped roof tiles present safety risks. Loose tiles can dislodge completely, posing a threat to your family, neighbors, or passersby. The weight of a falling roof tile can cause serious injury or property damage. It is essential to fix slipped roof tiles promptly to prevent accidents and ensure the safety of those around your home.
Moreover, navigating a roof with slipped tiles can be hazardous, especially if there are other underlying structural issues. Walking on a roof with unstable tiles increases the risk of slips, trips, and falls. The uneven surface and potential for loose tiles to shift underfoot make it a dangerous task for even experienced individuals. By repairing slipped roof tiles, you eliminate this safety hazard and provide a secure environment for any future roof maintenance or repairs.
It’s important to note that fixing slipped roof tiles requires proper safety precautions and expertise. It is recommended to hire a professional roofing contractor who can assess the extent of the damage, identify any underlying issues, and perform the necessary repairs safely and effectively.
Tools Needed for Fixing Slipped Roof Tiles
Before you begin the repair process, gather the necessary tools and equipment. Depending on the extent of the damage, you may require both basic tools and specialized roofing tools.
When it comes to fixing slipped roof tiles, it’s important to have the right tools at your disposal. These tools will not only make the repair process easier but also ensure that the job is done correctly and efficiently. Let’s take a closer look at the tools you’ll need:
Basic Tools for the Job
For repairing slipped roof tiles, you will need the following basic tools:
- Roofing hammer or nail gun: A roofing hammer or nail gun is essential for securing the tiles back in place. It allows you to drive nails into the roof with precision and ease.
- Roofing nails: These nails are specifically designed for roofing applications. They have a larger head and a galvanized coating to withstand the elements.
- Chalk line: A chalk line helps you create straight lines and ensure that the tiles are aligned properly.
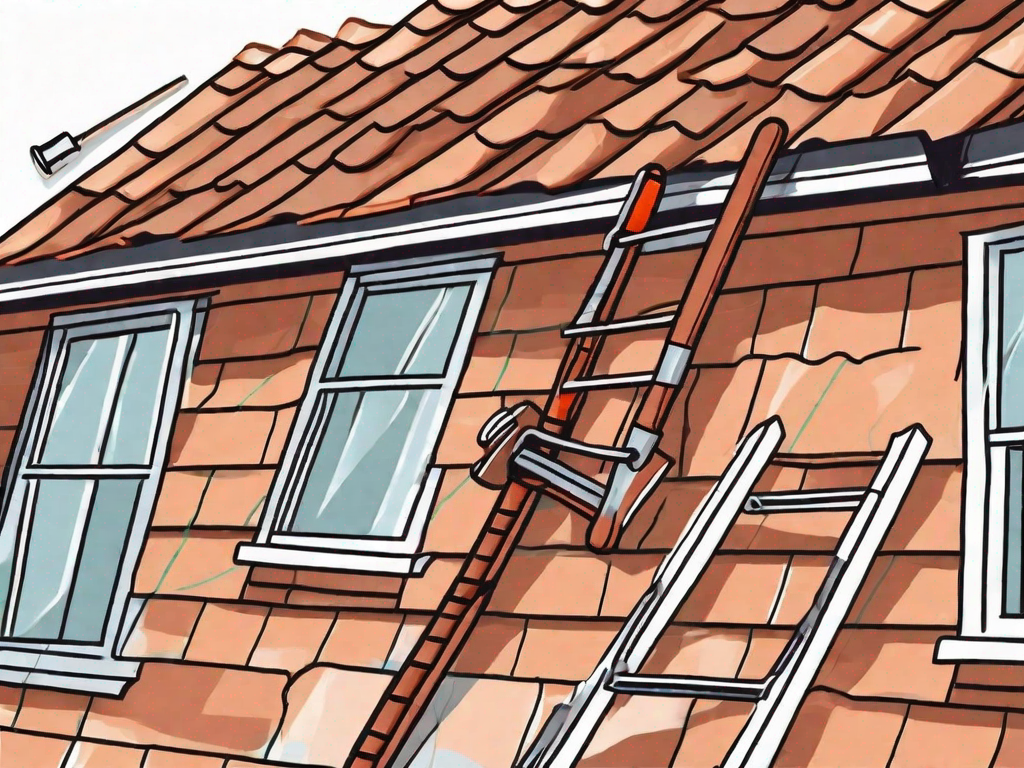
- Ladder: A sturdy ladder is necessary to access the roof safely. Make sure the ladder is in good condition and placed on a stable surface.
- Safety harness or roof brackets: Safety should be your top priority when working on the roof. A safety harness or roof brackets can prevent accidents and provide stability.
- Roofing cement or adhesive: Roofing cement or adhesive is used to secure loose tiles and prevent water leakage. It provides a strong bond and ensures the longevity of the repair.
- Utility knife or roof tile cutter: These tools are handy for cutting and shaping tiles to fit specific areas of the roof. They allow for precise and clean cuts.
- Safety goggles and gloves: Protecting your eyes and hands is crucial when working with roofing materials. Safety goggles shield your eyes from debris, while gloves provide a barrier against sharp edges.
Specialized Roofing Tools
In addition to the basic tools, you may require specialized roofing tools depending on the complexity of the repair. These tools include:
- Roofing shingle remover: This tool helps you remove damaged or old shingles with ease. It minimizes the risk of damaging surrounding tiles during the removal process.
- Roofing nail gun or stapler: If you’re dealing with a larger repair job, a roofing nail gun or stapler can save you time and effort. It allows for quick and efficient installation of new tiles.
- Roofing tile alignment tool: This tool ensures that the tiles are properly aligned and evenly spaced. It helps maintain the aesthetic appeal of the roof while providing structural integrity.
- Telescoping roof rake: A telescoping roof rake is useful for removing debris, leaves, and snow from the roof. It prevents the accumulation of moisture and reduces the risk of roof damage.
- Ridge tile grips: Ridge tile grips are designed to hold ridge tiles securely in place. They provide extra support and prevent the tiles from slipping or becoming dislodged.
Having these specialized tools on hand will make the repair process smoother and more efficient. They are designed to tackle specific challenges that may arise during the repair of slipped roof tiles.
Preparing for the Repair
Before you begin fixing the slipped roof tiles, there are a few important steps to take to ensure a safe and effective repair.
Safety Measures to Consider
Prioritize safety by taking the following precautions:
- Wear appropriate protective gear, including a safety harness or roof brackets, safety goggles, and gloves.
- Clear the area around the work zone of any debris or potential hazards.
- If using a ladder, ensure it is stable and secure by placing it on a flat, sturdy surface.
- Work during dry weather conditions to minimize the risk of slipping or accidents.
Assessing the Extent of the Damage
Take a thorough look at your roof to identify the number of slipped roof tiles and assess the overall scope of the repair. This will help you determine the materials and tools you need, as well as estimate the time required for the project.
Step-by-Step Guide to Fixing Slipped Roof Tiles
Now that you have gathered your tools and prepared the work area, it’s time to proceed with fixing the slipped roof tiles. Follow these steps to ensure a successful repair.
Removing the Slipped Tiles
Start by removing the slipped tiles carefully. Use a roofing shingle remover or a flat prying tool to lift the tiles without causing further damage. Take note of their positioning for proper realignment or replacement.
Replacing or Realigning the Tiles
If the slipped tiles are in good condition, you can simply realign them by sliding them back into place. Use a tile alignment tool to ensure proper positioning. If the tiles are damaged or not salvageable, replace them with new ones. Secure the tiles by nailing them in place or using roofing adhesive.
Checking and Finishing the Job
After replacing or realigning the tiles, check that they are securely in place. Inspect the surrounding tiles to ensure they are not compromised. Use roofing cement or adhesive as needed to reinforce the repair. Finally, clean up the work area and safely descend from the roof.
By following these step-by-step guidelines, you can fix slipped roof tiles and restore the integrity of your roof. Regular maintenance and prompt repairs are essential for ensuring the longevity of your roof and the protection of your home.
Leave a Reply