Is your car door panel marred with scratches? Don’t worry, you can restore its beauty with a few simple steps. In this guide, we’ll take you through the process of fixing scratches on a car door panel. Whether the scratches are minor or deep, we’ll cover it all. So, let’s get started!
Understanding the Severity of Car Door Panel Scratches
Before we dive into the repair process, it’s important to understand the severity of the scratches. This will help you determine the appropriate course of action. Car door panel scratches can range from minor surface blemishes to deep cuts that expose the metal underneath.
When it comes to car door panel scratches, there is a wide spectrum of severity. Some scratches are barely noticeable, while others can be quite deep and prominent. Understanding the severity of the scratches on your car’s door panel is crucial in order to determine the best approach for repair.
Identifying Minor Scratches
Minor scratches usually appear as shallow marks on the car’s paint. They are often caused by keys, fingernails, or other light impacts. These scratches typically do not penetrate the clear coat layer and can be easily repaired.
Imagine you’re walking towards your car, keys in hand, and accidentally brush against the door panel. You may notice a faint scratch, barely visible to the naked eye. These minor scratches are often superficial, affecting only the topmost layer of paint. They are usually shallow and do not pose a significant threat to the overall appearance of your car.
While minor scratches may not be a cause for immediate concern, it’s still important to address them promptly. Even small scratches can worsen over time if left untreated, as they can become more susceptible to rust and corrosion.
Recognizing Deep Scratches
Deep scratches, on the other hand, are more serious. These scratches penetrate the clear coat layer and may even reach the base coat or metal surface. Deep scratches are often caused by accidents or rough encounters with sharp objects. Repairing deep scratches requires additional steps to ensure a seamless finish.
Imagine you’re driving down the road and accidentally scrape your car’s door panel against a concrete pillar. The result is a deep scratch that not only mars the paint but also exposes the underlying layers. These deep scratches can be quite alarming, as they compromise the integrity of the paint and leave the metal vulnerable to rust and corrosion.
Repairing deep scratches requires a more involved process. It typically involves sanding down the affected area, applying primer to promote adhesion, and carefully layering paint to match the original color. The goal is to restore the damaged area to its pre-scratch condition, ensuring a seamless and invisible repair.
It’s worth noting that deep scratches can sometimes be accompanied by dents or other forms of damage. In such cases, it may be necessary to seek professional help to properly address all the issues and restore your car’s door panel to its original state.
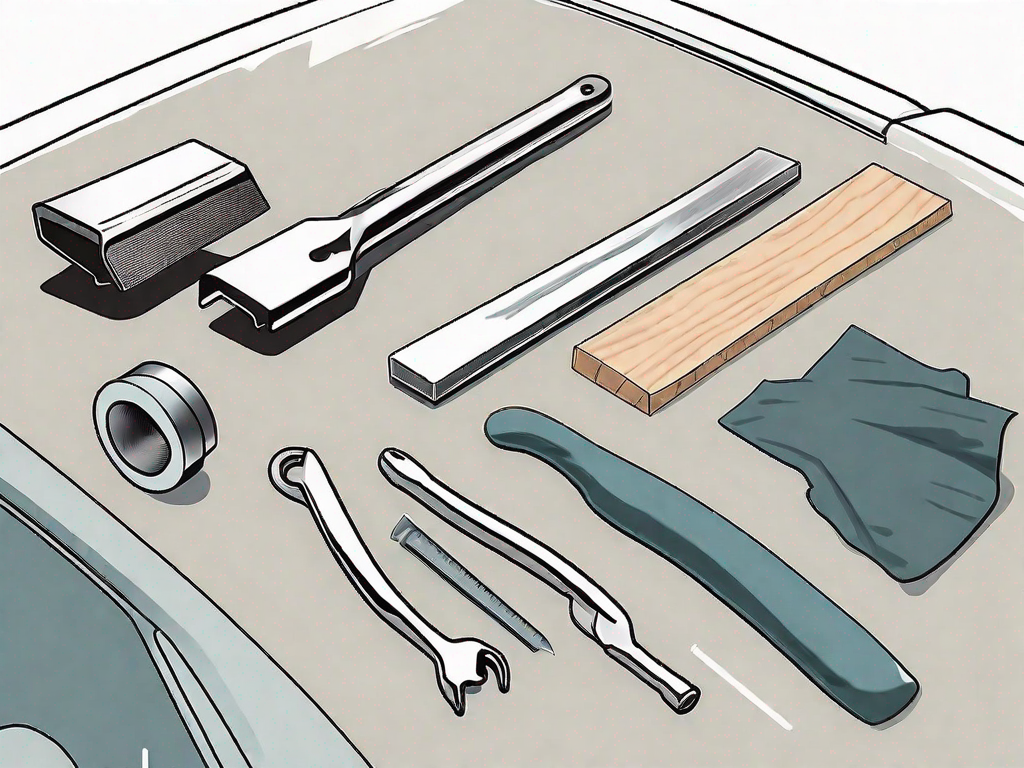
Gathering the Necessary Tools and Materials
Before you begin the repair process, it’s essential to gather all the tools and materials you’ll need. Having everything ready will make the job easier and more efficient.
Now, let’s take a closer look at the tools and materials required for minor and deep scratch repair. By understanding the specific items needed, you can ensure that you have everything at hand to successfully complete the task.
Tools for Minor Scratch Repair
When it comes to minor scratch repair, a few essential tools can make all the difference. These tools are specifically designed to address superficial scratches and restore the appearance of your vehicle’s paintwork. Here are the tools you’ll need:
- Microfiber cloth: A high-quality microfiber cloth is crucial for cleaning and preparing the surface before applying any scratch remover or polishing compound.
- Scratch remover: A specialized scratch remover is designed to gently remove surface scratches without damaging the surrounding paint. Choose a product that matches the color of your vehicle’s paint for optimal results.
- Polishing compound: After using the scratch remover, a polishing compound helps to further refine the surface and restore its shine. Look for a compound specifically formulated for automotive use.
- Polishing pad: To apply the polishing compound evenly, a soft polishing pad is necessary. This pad helps to distribute the compound and ensures a smooth and consistent finish.
Materials for Deep Scratch Repair
For deeper scratches that penetrate the clear coat and reach the base layer of paint, a more comprehensive set of materials is required. These materials will help you achieve a more thorough repair and prevent further damage. Here are the materials you’ll need:
- Automotive touch-up paint: To match the color of your vehicle’s paint, an automotive touch-up paint is essential. This paint is specifically formulated to adhere to the surface and provide a seamless repair.
- Clear coat: After applying the touch-up paint, a clear coat is necessary to protect the repaired area and ensure a long-lasting finish. The clear coat adds an extra layer of protection against the elements.
- Sanding block: In order to smooth out the surface and prepare it for touch-up paint, a sanding block is required. This tool helps to level the area and create a seamless transition between the repaired and surrounding paint.
- Primer: If the scratch is deep and exposes the bare metal, applying a primer is crucial to prevent rust and ensure proper adhesion of the touch-up paint.
- Masking tape: To protect the surrounding areas from accidental paint overspray, masking tape is necessary. This tape creates a barrier that ensures a clean and precise repair.
By gathering all the necessary tools and materials before starting the repair process, you’ll be well-prepared to tackle any scratches on your vehicle’s paintwork. Remember to follow the instructions provided with each product and take your time to achieve the best possible results.
Preparing the Car Door Panel for Repair
Before you jump into fixing the scratches, it’s crucial to properly prepare the car door panel. This step ensures the best results and helps the repair materials adhere properly.
Properly preparing the car door panel before repairing the scratches is essential for achieving a flawless finish. By following a few simple steps, you can ensure that the repair is seamless and long-lasting.
Cleaning the Scratch Area
Start by thoroughly cleaning the scratch area. Use a mild soap and water solution to remove any dirt or debris surrounding the scratch. Gently scrub the area with a soft cloth or sponge, paying close attention to the scratched portion. This will help remove any loose particles that may interfere with the repair process.
After cleaning, rinse the area with clean water and ensure that all soap residue is completely removed. It’s important to allow the area to dry completely before proceeding to the next step. This will prevent any moisture from affecting the adhesion of the repair materials.
Sanding the Scratch
In the case of deep scratches, you’ll need to lightly sand the affected area. This step helps to level the surface and create a smooth base for the repair materials.
Before you begin sanding, gather a fine-grit sanding block or sandpaper. It’s crucial to choose a grit that is appropriate for the depth of the scratch. Start with a higher grit number, such as 800 or 1000, and gradually work your way to a lower grit number, if necessary.
Hold the sanding block or sandpaper firmly and apply gentle pressure as you move it back and forth over the scratch. Be cautious not to sand too aggressively, as this may cause further damage to the surrounding paint. The goal is to smooth out the edges of the scratch, making it easier to blend in the repair materials later on.
After sanding, wipe away any dust or debris with a clean, dry cloth. This will ensure a clean surface for the next steps of the repair process.
Repairing Minor Scratches
Minor scratches can often be fixed without needing to repaint the car door panel. Let’s go through the steps to repair these types of scratches.
Applying Scratch Remover
Applying scratch remover is the first step in repairing minor scratches on your car door panel. To begin, gather a microfiber cloth and a small amount of scratch remover. The scratch remover should be specifically designed for automotive use and should be suitable for the type of paint on your car.
Once you have the necessary materials, apply a small amount of scratch remover to the microfiber cloth. It’s important to use a soft cloth to avoid any further damage to the paint. Gently rub the scratch remover into the scratched area using firm, circular motions. The circular motions help to distribute the product evenly and ensure thorough coverage of the scratch.
As you continue rubbing, you may notice the scratch becoming less noticeable or even disappearing completely. This is a good sign that the scratch remover is effectively working to repair the damage. However, keep in mind that deeper or more severe scratches may require additional steps or professional assistance.
Polishing the Area
After applying the scratch remover, it’s time to move on to the next step: polishing the area. Polishing helps to further smooth out the scratch and blend it in with the surrounding paint, creating a seamless finish.
To begin the polishing process, you’ll need a polishing compound and a polishing pad. The polishing compound is designed to remove any remaining imperfections and restore the shine to the paint. Similarly to the scratch remover, make sure to choose a polishing compound that is suitable for automotive use and compatible with your car’s paint.
Apply a small amount of the polishing compound to the polishing pad. Using circular motions, work the compound into the scratch. The circular motions help to evenly distribute the compound and ensure thorough coverage of the damaged area. As you continue polishing, you’ll notice the scratch blending in more and more with the surrounding paint, creating a smooth and seamless appearance.
It’s important to note that the amount of polishing required may vary depending on the depth and severity of the scratch. Deeper scratches may require more time and effort to achieve the desired results. Additionally, it’s always a good idea to follow the instructions provided by the manufacturer of the scratch remover and polishing compound for best results.
By following these steps and taking the time to properly repair minor scratches on your car door panel, you can restore the appearance of your vehicle and protect it from further damage. Remember, regular maintenance and care can go a long way in keeping your car looking its best.
Fixing Deep Scratches
Deep scratches require a more involved repair process. Follow these steps to restore your car door panel to its original condition.
Using a Scratch Repair Kit
Start by using a scratch repair kit that matches your car’s paint color. These kits usually contain touch-up paint, clear coat, primer, and application tools. Follow the instructions provided with the kit to apply the touch-up paint and clear coat to the deep scratch. Allow each layer to dry completely before applying the next.
Painting and Clear Coat Application
If you don’t have a scratch repair kit, you can still fix deep scratches with individual paint and clear coat products. Apply a thin layer of primer to the sanded area, ensuring it covers the scratch and a small surrounding area. Once the primer has dried, carefully apply the touch-up paint. Finish off by applying a layer of clear coat to protect the repaired area.
Now that you have the knowledge and tools to fix scratches on your car door panel, you can restore its appearance and protect its value. Remember, patience and attention to detail are key to achieving a professional-looking repair. Happy fixing!