Hanger bumps can be an annoying and unsightly problem, but fear not! With this step-by-step guide, you’ll learn how to fix hanger bumps and keep your clothes looking their best. In this article, we’ll cover everything from understanding hanger bumps to preventing them in the future. So let’s dive in and get rid of those pesky bumps!
Understanding Hanger Bumps
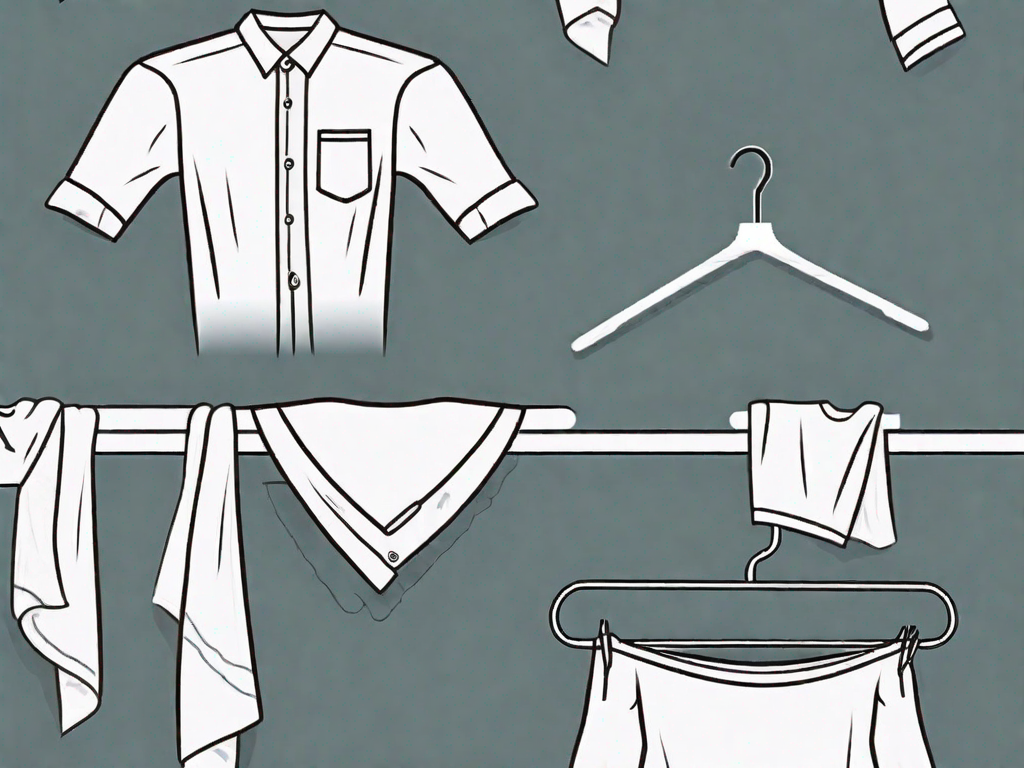
What are Hanger Bumps?
Before we can fix hanger bumps, it’s essential to understand what they are. Hanger bumps are those irritating indentations that appear on the shoulders of your garments when they have been hanging for too long. They are caused by the weight of the garment pulling down on the hanger, creating a visible ridge. If left untreated, hanger bumps can be challenging to remove! But don’t worry, we’ve got you covered.
Now, let’s delve deeper into the world of hanger bumps and explore the various causes and prevention strategies.
Causes of Hanger Bumps
Hanger bumps are caused by a combination of factors. The primary cause is using the wrong type of hanger. Wire hangers or hangers without proper shoulder support are the usual culprits. These hangers lack the necessary structure to hold the weight of the garment evenly, leading to concentrated pressure on the shoulders.
Another contributing factor is improper hanging techniques. When clothes are not hung properly, with the shoulders properly aligned on the hanger, it can create tension points that result in hanger bumps. Additionally, leaving clothes on hangers for extended periods without wearing them can exacerbate the problem. The weight of the fabric, combined with gravity, gradually causes the indentation to form.
Now that we understand the causes, let’s move on to prevention strategies to help you avoid those pesky hanger bumps.
Prevention of Hanger Bumps
Choosing the Right Hangers
The first step in preventing hanger bumps is selecting the appropriate hangers. Opt for hangers with wide, rounded shoulders that mimic the natural shape of your shoulders. This design helps to maintain the integrity of your clothes and prevents them from developing unsightly bumps. Look for hangers made of materials like wood or padded fabric, as they provide better support and reduce the likelihood of bumps forming.
Wooden hangers, for example, are known for their sturdiness and ability to distribute the weight of your clothes evenly. They also have a smooth surface that minimizes friction, preventing any potential damage to your garments. Padded fabric hangers, on the other hand, offer a soft and cushioned surface that gently cradles your clothes, keeping them in pristine condition.
When choosing hangers, consider the type of clothing you’ll be hanging. For delicate items like silk blouses or dresses, opt for hangers with a non-slip feature. These hangers usually have a velvet or rubber coating that prevents clothes from slipping off and getting wrinkled or damaged.
Proper Hanging Techniques
Hanging your clothes properly is just as important as choosing the right hangers. Start by buttoning up shirts and closing zippers on pants to distribute the weight evenly. This simple step helps to maintain the shape of your clothes and prevents them from developing bumps or creases in specific areas.
Another technique to prevent hanger bumps is to avoid overcrowding your closet. When your clothes are tightly packed, they can rub against each other, causing friction and creating unwanted creases. Give your garments enough space to breathe and move freely. This not only prevents hanger bumps but also allows you to easily see and access your clothes, making your daily routine more efficient.
Consider organizing your closet by garment type or color to further prevent hanger bumps. By grouping similar items together, you can easily find what you’re looking for without having to rummage through a cluttered closet. This organization method also helps to minimize the chances of accidentally snagging or pulling on clothes, which can lead to hanger bumps.
Lastly, pay attention to the weight distribution when hanging multiple items on a single hanger. If you’re hanging a suit, for example, make sure the jacket is properly aligned and centered on the hanger, with the pants neatly folded over the bottom bar. This ensures that the weight is evenly distributed and reduces the risk of hanger bumps forming on either piece of clothing.
Step-by-Step Guide to Fixing Hanger Bumps
Have you ever pulled a shirt out of your closet, only to find those pesky hanger bumps ruining its sleek appearance? Don’t worry – we’ve got you covered! In this step-by-step guide, we’ll walk you through the process of fixing hanger bumps, so you can restore your garment to its former glory.
Materials Needed
Before we begin fixing hanger bumps, let’s gather the necessary materials. You’ll need a clean towel, a flat iron with adjustable heat settings, and some distilled water. These items are essential to ensure a successful outcome.
Now that you have everything you need, let’s dive into the process of fixing those unsightly hanger bumps!
Preparing the Garment
Start by placing the garment on a clean, flat surface. Gently smooth out any wrinkles or folds in the fabric with your hands. This step is crucial as it helps create a smooth foundation for the ironing process. If the garment is delicate, consider placing a thin cloth on top to protect it from direct heat.
Now that your garment is prepped and ready, we can move on to the main event – eliminating those hanger bumps!
The Ironing Process
Set your flat iron to a low or medium heat setting suitable for the fabric of your garment. If you’re unsure, consult the care label for guidance. It’s important to use the appropriate heat level to prevent any damage to the fabric.
Once the iron is heated, place the clean towel over the hanger bump and lightly mist it with distilled water. This step will help to moisten the fabric and make it more pliable, making it easier to smooth out the hanger bump.
Now, it’s time to put your ironing skills to the test! Gently press the iron over the towel-covered hanger bump, moving it in small circular motions. Be sure to apply even pressure and avoid leaving the iron in one spot for too long, as this can damage the fabric.
If necessary, repeat the process until the hanger bump starts to disappear. Remember, patience is key – take your time and be gentle with the fabric.
Finishing Touches
Once you’ve successfully removed the hanger bump, give the garment a final once-over with the iron to ensure it’s smooth and ready to wear. Pay attention to any remaining wrinkles or creases and iron them out for a flawless finish.
Now that your garment is hanger bump-free, it’s time to take preventive measures to avoid future bumps. Hang the clothing on a properly-sized hanger that provides adequate support for the fabric. This will help maintain the garment’s shape and prevent new hanger bumps from forming.
Congratulations – you’ve fixed the hanger bump and saved your garment! Now you can confidently wear your favorite shirt without any unsightly bumps getting in the way.
Remember, this method can be used for various types of garments, so feel free to apply it to other items in your wardrobe. With a little practice, you’ll become a pro at banishing hanger bumps and keeping your clothes looking their best!
Maintaining a Hanger Bump-Free Wardrobe
Having a well-organized and visually appealing wardrobe is a goal for many fashion enthusiasts. However, one common issue that can mar the overall look of your clothes is hanger bumps. These unsightly creases can be frustrating to deal with, but with the right knowledge and preventive measures, you can keep your wardrobe bump-free.
Regular Wardrobe Checks
Prevention is always better than cure, so make it a habit to inspect your wardrobe regularly. Take a few moments to examine each garment for signs of hanger bumps or other damage. Look closely at the shoulders and upper back areas, as these are common spots for bumps to form. If you notice any bumps starting to form, address them promptly before they become more difficult to fix.
When it comes to hanger bumps, early intervention is key. The longer a bump is left unattended, the more stubborn it becomes, making it harder to remove. By regularly checking your wardrobe, you can catch these bumps in their early stages and take immediate action.
Proper Storage of Clothes
In addition to regular checks, proper storage is crucial for maintaining a hanger bump-free wardrobe. When not in use, store your clothes in a cool, dry closet with enough space between each garment. Avoid overcrowding your closet, as this can lead to clothes being squished together and causing hanger bumps.
Consider using garment bags or covers to protect delicate fabrics and prevent them from rubbing against one another. These covers act as a barrier, reducing the chances of hanger bumps forming. Furthermore, they provide an extra layer of protection against dust and other potential sources of damage.
Another useful tip is to invest in quality hangers. Sturdy hangers with proper shoulder support can help maintain the shape of your clothes and minimize the risk of hanger bumps. Avoid using wire or flimsy hangers that can leave imprints on your garments.
When to Seek Professional Help
If you’ve tried the steps outlined in this guide and can’t remove a stubborn hanger bump, it may be time to seek professional help. Local dry cleaners or tailors have expertise in handling delicate fabrics and stubborn bumps. They can use advanced techniques and equipment to restore your garment to its former glory.
Professional cleaners often have specialized steamers or pressing machines that can effectively eliminate hanger bumps. Additionally, they have the knowledge and experience to handle different fabric types, ensuring that your clothes are treated with care.
Now that you know how to fix hanger bumps, you can confidently tackle this common wardrobe problem. Remember to select the right hangers, hang your clothes correctly, and promptly address any bumps that may arise. With a little effort and attention to detail, you’ll enjoy a hanger bump-free wardrobe for years to come.
So, take the time to regularly inspect your wardrobe, invest in proper storage solutions, and seek professional help when needed. By following these guidelines, you’ll be well on your way to maintaining a hanger bump-free wardrobe that showcases your clothes in their best light.