Paintbrushes are essential tools for any artist or DIY enthusiast. They allow you to create beautiful, intricate designs and transform any surface into a work of art. However, over time, paintbrushes can become frayed, making it difficult to achieve precise strokes and diminishing their overall effectiveness. In this step-by-step guide, we will explore the causes of frayed paintbrushes and provide you with practical tips on how to fix and maintain them.
Understanding the Anatomy of a Paintbrush
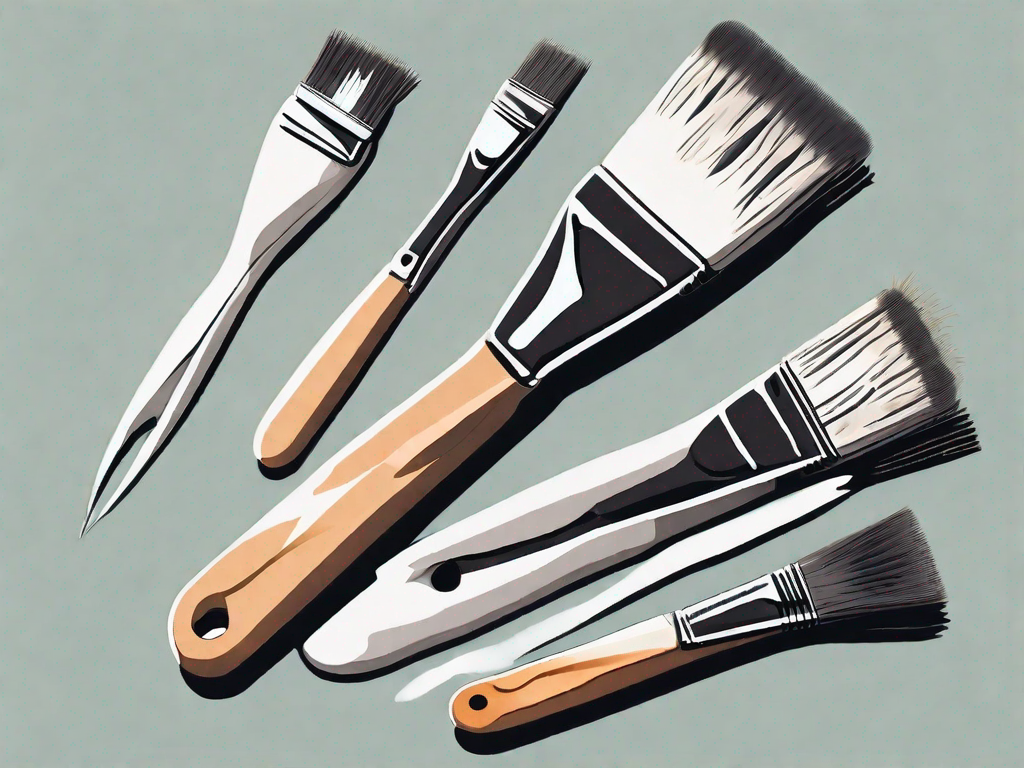
Before we delve into the process of fixing frayed paintbrushes, it is important to familiarize ourselves with their anatomy. A paintbrush consists of three main components: bristles, ferrule, and handle.
When it comes to paintbrushes, the bristles are the unsung heroes. They are the ones that do the actual work of applying paint to the canvas. Bristles come in different types, such as natural or synthetic fibers. Natural bristles, made from animal hair, are perfect for oil-based paints, while synthetic bristles are ideal for water-based paints. The choice of bristles can greatly affect the outcome of the artwork. The bristles determine the softness or stiffness of the brush, affecting the brushstroke and overall performance.
Now, let’s talk about the ferrule. This seemingly insignificant metal or plastic band plays a vital role in maintaining the brush’s integrity. It is the unsung hero that holds the bristles in place, preventing them from loosening or falling out over time. Without a sturdy ferrule, the bristles would be prone to shedding, making it difficult to achieve precise and consistent brushstrokes.
Lastly, we have the handle. While it may seem like just a simple part of the paintbrush, the handle actually plays a crucial role in the artist’s comfort and control. A well-designed handle allows the artist to maneuver the brush with ease, ensuring smooth and fluid movements. Whether it’s a long handle for better reach or a short handle for more control, the handle is an essential aspect of the paintbrush that shouldn’t be overlooked.
So, the next time you pick up a paintbrush, take a moment to appreciate its intricate anatomy. From the bristles that determine the brushstroke to the ferrule that holds everything together, each component plays a significant role in the artist’s creative process. Understanding the anatomy of a paintbrush not only enhances your appreciation for this humble tool but also helps you make informed choices when it comes to selecting the right brush for your artistic endeavors.
Identifying the Causes of Frayed Paintbrushes
Now that we understand the anatomy of a paintbrush, let’s explore the common causes of fraying.
Paintbrushes are essential tools for artists, allowing them to express their creativity on various surfaces. However, these brushes are not immune to wear and tear, and one common issue artists face is frayed paintbrushes. Frayed bristles not only affect the quality of the brush strokes but also make it challenging to achieve the desired artistic effects. To prevent this problem, it is crucial to understand the causes of fraying and take appropriate measures to maintain the brushes.
Improper Cleaning Techniques
One of the primary reasons paintbrushes become frayed is improper cleaning techniques. When you fail to clean your brushes thoroughly after each use, paint residue can accumulate and harden, causing the bristles to separate and fray. It is essential to clean your brushes immediately after use to prevent the paint from drying and hardening on the bristles.
Proper cleaning involves using a mild soap or brush cleaner and warm water. Gently swirl the brush in the cleaning solution, ensuring that the bristles are thoroughly cleaned. Avoid using harsh solvents or scrubbing the bristles vigorously, as these actions can damage the brush and lead to fraying.
Additionally, it is crucial to rinse the brushes thoroughly to remove any residual soap or cleaning solution. Leaving any residue on the bristles can also contribute to fraying over time.
Inadequate Storage Conditions
Poor storage conditions can also contribute to frayed paintbrushes. Storing brushes upright in a container or allowing them to dry with paint residue can bend or distort the bristles, leading to irreversible damage. To maintain the shape and prolong the lifespan of your brushes, it is essential to store them properly.
When storing your brushes, it is recommended to lay them horizontally or hang them upside down. This position allows the bristles to remain straight and prevents any bending or distortion. You can use a brush holder or a dedicated brush rack to keep your brushes organized and in the correct position.
Furthermore, it is crucial to ensure that the brushes are completely dry before storing them. Any moisture left in the bristles can lead to mold or mildew growth, which can weaken the bristles and contribute to fraying. Allow the brushes to air dry naturally in a well-ventilated area before putting them away.
By adopting proper cleaning techniques and providing adequate storage conditions, you can significantly reduce the risk of frayed paintbrushes. Taking care of your brushes not only extends their lifespan but also enhances your artistic experience by allowing you to create smooth and precise brushstrokes.
Preparing Your Frayed Paintbrush for Restoration
Before you embark on the journey of fixing your frayed paintbrush, there are a few preparatory steps you need to take.
Restoring a frayed paintbrush requires careful attention to detail and the use of proper materials. By following these steps, you can bring your paintbrush back to life and ensure it performs at its best.
Gathering Necessary Materials
Ensure you have the following materials: warm water, mild soap or brush cleaner, a clean towel or paper towels, and a comb or brush reshaping tool. These items will be instrumental in the restoration process.
Warm water is essential for loosening the dried paint and softening the bristles. Mild soap or brush cleaner will help remove any residual paint or debris. A clean towel or paper towels are necessary for drying the brush after cleaning. Lastly, a comb or brush reshaping tool will aid in restoring the brush’s original shape.
Assessing the Damage
Examine your frayed paintbrush and determine the extent of the damage. Identifying the areas that need restoration will help you focus your efforts and achieve the best possible results.
Look closely at the bristles of the paintbrush. Are they frayed or bent? Are there any clumps of dried paint? Assessing the damage will allow you to understand the level of restoration required. It will also help you determine if the brush is salvageable or if it’s time to invest in a new one.
Take note of any specific areas that need attention. Are there bristles that are completely bent out of shape? Are there areas where the bristles have become separated or matted together? By identifying these problem areas, you can prioritize your restoration efforts and ensure that the brush is fully restored.
Step-by-Step Process to Fix Frayed Paintbrushes
Now that you have prepared your paintbrush, let’s walk through the step-by-step process of fixing frayed bristles.
Fixing frayed paintbrushes is an essential skill for any artist or DIY enthusiast. Over time, the bristles of a paintbrush can become worn, frayed, or clumped together, affecting the quality of your brush strokes and the overall outcome of your artwork. By following these simple steps, you can restore your paintbrush to its original condition and ensure optimal performance.
Cleaning the Paintbrush
Start by rinsing the brush under warm water to remove any excess paint. This step is crucial as it helps to loosen and dissolve the dried paint particles that may be trapped within the bristles. As you rinse the brush, gently massage the bristles with your fingers to dislodge any stubborn paint.
Once you have rinsed off the excess paint, it’s time to clean the bristles more thoroughly. Apply a small amount of mild soap or brush cleaner to your palm or directly onto the bristles. Gently lather the bristles, working the soap into the fibers with your fingers. This process helps to break down any remaining paint residue and remove dirt or debris that may have accumulated.
After lathering the bristles, rinse the brush thoroughly until the water runs clear. This step ensures that all soap and paint residues are completely removed, leaving your paintbrush clean and ready for the next step.
Reshaping the Bristles
While the bristles are still wet, use a comb or brush reshaping tool to carefully remove any tangles or clumps. Start by holding the brush with one hand and gently comb through the bristles from the ferrule to the tips. This action helps to separate any bristles that may have clumped together during the cleaning process.
As you comb through the bristles, pay close attention to their alignment. Ensure that the bristles are uniformly spread out and that they follow the natural shape of the brush. This step is essential for restoring the original shape of the bristles and enhancing their performance.
If you encounter any stubborn tangles or clumps, be patient and continue combing through the bristles until they are smooth and untangled. Taking the time to reshape the bristles properly will greatly improve the overall functionality of your paintbrush.
Drying and Storing Your Restored Paintbrush
After reshaping the bristles, it’s time to dry your paintbrush. Start by blotting the excess water with a towel or paper towels. Gently press the bristles against the towel to absorb the moisture without deforming their shape.
Once you have removed most of the water, allow the brush to air dry completely. Placing the brush in a horizontal position or hanging it upside down will help to maintain the shape of the bristles and prevent fraying.
Proper drying and storage are crucial to ensure the longevity of your restored paintbrush. Avoid storing the brush in a closed container or leaving it in a damp environment, as this can lead to mold or mildew growth. Instead, find a clean and dry area where you can store your paintbrush safely until its next use.
By following these step-by-step instructions, you can effectively fix frayed paintbrushes and extend their lifespan. Regular maintenance and care will not only save you money in the long run but also allow you to create beautiful artwork with precision and ease.
Maintaining Your Paintbrushes to Prevent Fraying
Now that you have successfully restored your frayed paintbrush, it is crucial to adopt proper maintenance practices to prevent future fraying.
Proper Cleaning After Each Use
After each painting session, clean your brushes thoroughly using the techniques mentioned earlier. Ensure all traces of paint have been removed, and the bristles are clean and free from residue. Proper cleaning prevents paint build-up and maintains the brush’s integrity.
Ideal Storage Solutions
Store your paintbrushes horizontally or hang them upside down in a well-ventilated area. This prevents the bristles from becoming misshapen or frayed. Additionally, consider using protective covers or cases to prevent accidental damage.
Regular Inspection and Care
Regularly inspect your paintbrushes for signs of wear or damage. If you notice any fraying or worn bristles, address the issue promptly to prevent further deterioration. Remember, a well-maintained brush will serve you well for years to come.
By following these step-by-step instructions and incorporating proper maintenance practices, you can revive your frayed paintbrushes and ensure they continue to produce impeccable brushstrokes. Remember, a high-quality paintbrush is an investment worth caring for, as it plays a significant role in the execution of your artistic vision.