Are your beloved checkered Vans starting to look faded and worn out? Don’t worry, with a little patience and effort, you can easily restore them to their former glory. In this article, we will guide you through the process of fixing your faded checkered Vans, starting from understanding the causes of fading to providing maintenance tips for your restored sneakers. So, let’s dive right in!
Understanding the Causes of Fading
Fading can occur due to various factors, and understanding them is crucial to prevent future damage. Two primary culprits behind fading are sunlight and wear and tear.
When it comes to your beloved checkered Vans, it’s important to know that their vibrant colors can gradually fade over time. But why does this happen? Let’s delve deeper into the causes of fading and explore how you can protect your favorite pair of shoes.
The Role of Sunlight in Fading
Sunlight is one of the main contributors to the fading of fabric. The UV rays present in sunlight break down the dyes in the fabric over time, causing the colors to lose their vibrancy. Therefore, prolonged exposure to sunlight can significantly impact the appearance of your checkered Vans.
Imagine wearing your stylish checkered Vans on a sunny day, strolling through the park or enjoying a picnic. While you’re enjoying the warmth of the sun, your shoes are silently being affected. The UV rays penetrate the fabric, gradually breaking down the dye molecules and altering the colors. This process is known as photodegradation.
So, next time you plan to spend a day outdoors with your checkered Vans, consider giving them some shade or wearing them for shorter periods to minimize the exposure to direct sunlight.
Wear and Tear: A Major Culprit
Another factor that contributes to the fading of checkered Vans is the wear and tear they endure. As you wear your Vans, the constant friction and contact with surfaces can gradually fade the colors. In addition, regular washing and drying can also cause the colors to fade faster.
Think about all the adventures you’ve had in your checkered Vans. From long walks in the city to skateboarding sessions at the local park, your shoes have been through it all. The constant rubbing against different surfaces, such as concrete or asphalt, can cause the dye molecules to loosen and fade.
Furthermore, when you toss your checkered Vans into the washing machine, the agitation and the use of detergents can further accelerate color fading. The combination of water, detergent, and mechanical action can weaken the dye bonds, leading to a loss of color intensity.
The Impact of Washing Methods
Not all washing methods are created equal, and some can harm the colors of your checkered Vans. Using harsh detergents, hot water, or machine drying can accelerate color fading. Therefore, it is essential to use gentle cleaning methods to minimize color loss.
When it’s time to give your checkered Vans a refresh, opt for hand washing instead of machine washing. Use a mild detergent specifically designed for delicate fabrics and lukewarm water. Gently scrub the shoes with a soft brush or cloth, paying attention to any stained areas. Afterward, rinse them thoroughly and let them air dry in a shaded area.
By adopting these washing methods, you can help preserve the vibrant colors of your checkered Vans for a longer period.
Preparing Your Vans for Restoration
Before starting the restoration process, you need to ensure that your checkered Vans are clean and free from any dirt or stains. Taking the time to properly clean and gather the necessary materials will set the foundation for a successful restoration. Here’s what you need to do:
Cleaning Your Vans Thoroughly
Begin by removing the laces and brushing off any loose dirt or debris from the surface of your Vans. Pay attention to the crevices and hard-to-reach areas where dirt may have accumulated. This step is crucial as it will help create a clean canvas for the restoration process.
Once you’ve removed the loose dirt, it’s time to give your Vans a thorough cleaning. Fill a basin with lukewarm water and add a small amount of mild detergent. This will help break down any stubborn stains or grime. Submerge your Vans in the soapy water and let them soak for a few minutes to loosen any dirt.
Using a soft brush or sponge, gently scrub your Vans, paying close attention to the areas that require extra care. Work in circular motions to lift the dirt and stains from the fabric. Be careful not to scrub too vigorously, as this may damage the material.
Once you’ve thoroughly scrubbed your Vans, rinse them under clean water to remove any soap residue. Ensure that all the detergent has been washed away, as any remaining residue may affect the restoration process. After rinsing, gently squeeze out the excess water from your Vans.
Now it’s time to let your Vans air dry. Find a well-ventilated area and lay them flat on a clean towel or a drying rack. Avoid direct sunlight, as it may cause the colors to fade or the material to warp. Allow your Vans to dry completely before moving on to the next step.
Gathering the Necessary Materials
With your Vans now clean and dry, it’s time to gather all the materials you’ll need for restoring your faded checkered Vans. This step is essential to ensure a smooth and efficient restoration process.
First and foremost, you’ll require fabric paint in the colors that match your Vans’ checkered pattern. Take the time to find the exact shades that will bring your Vans back to life. Look for high-quality fabric paint that is specifically designed for use on shoes, as this will provide the best results.
In addition to the fabric paint, you’ll also need brushes of various sizes for painting. Different brush sizes will allow you to achieve different levels of detail and precision. Consider investing in a set of brushes specifically designed for painting on fabric, as they will provide better control and coverage.
Lastly, don’t forget to gather a sealant to protect the paint once applied. A sealant will help prevent the colors from fading or rubbing off over time. Look for a sealant that is compatible with fabric paint and follow the manufacturer’s instructions for application.
By taking the time to clean your Vans thoroughly and gather all the necessary materials, you are setting yourself up for a successful restoration. With a clean canvas and the right tools at your disposal, you’ll be ready to bring your faded checkered Vans back to their former glory.
Step-by-Step Guide to Restoring Faded Checkered Vans
Now that your Vans are clean and you have all the necessary materials, let’s dive into the step-by-step process of restoring their faded glory:
Applying the Base Coat
Start by applying a thin and even base coat of fabric paint to the faded areas of your checkered Vans. The base coat will help restore the original color intensity and provide a solid foundation for the checkered pattern.
Before applying the base coat, it’s important to ensure that the shoes are completely dry and free from any dirt or debris. You can use a soft brush or a damp cloth to gently clean the surface of the Vans, making sure to remove any loose particles that may interfere with the paint application.
Once the shoes are clean and dry, you can begin applying the base coat. It’s recommended to use a small brush or a sponge applicator for better control and precision. Start by dipping the brush into the fabric paint and removing any excess by gently tapping it on the edge of the paint container.
Next, carefully apply the paint to the faded areas of the checkered pattern, making sure to cover them evenly. Use smooth and even strokes to create a seamless finish. If you accidentally get paint on the surrounding areas, you can quickly wipe it off with a damp cloth before it dries.
After applying the base coat, allow it to dry completely. This may take a few hours, depending on the type of fabric paint you’re using and the weather conditions. It’s important to be patient and avoid touching the painted areas until they are fully dry to prevent smudging or smearing.
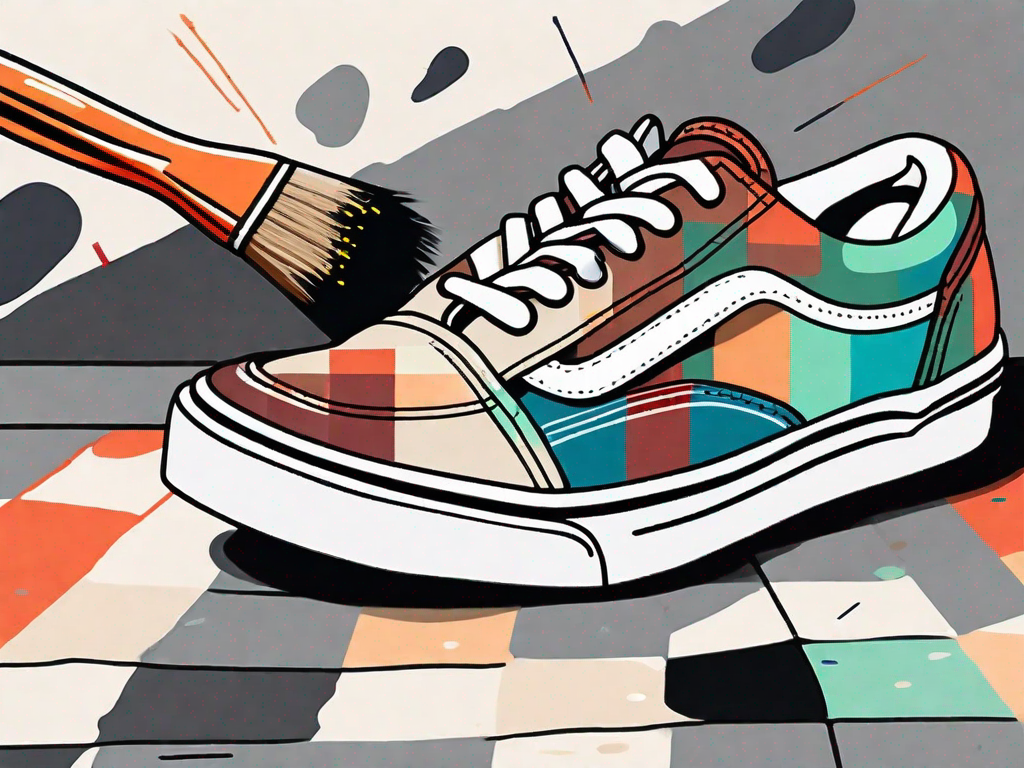
Painting the Checkered Pattern
Once the base coat is fully dry, it’s time to recreate the checkered pattern. Using a small brush, carefully paint the squares, alternating between the desired colors. Take your time and ensure that the edges are clean and the paint is evenly applied.
When painting the checkered pattern, it’s helpful to have a reference image or a template to guide you. You can create a template by drawing a checkered pattern on a piece of cardboard or thick paper and cutting out the squares. This will help you achieve a consistent and accurate design.
Dip the brush into the first color of paint and start painting the squares, following the pattern you’ve chosen. Take your time and be precise, making sure to fill in each square completely. Once you’ve finished painting all the squares with the first color, clean the brush and switch to the second color.
Repeat the process with the second color, painting the remaining squares. Make sure to clean the brush between color changes to avoid mixing the paints and creating unwanted shades. Take breaks if needed to rest your hand and maintain a steady hand for better control.
After completing the checkered pattern, step back and admire your work. If you notice any imperfections or areas that need touch-ups, you can use a small brush or a cotton swab to make the necessary corrections. Allow the paint to dry completely before moving on to the next step.
Sealing the Paint for Durability
To protect the paint and ensure its longevity, apply a fabric sealant over the painted areas. This will help prevent color fading and make your restored checkered Vans more resistant to future wear and tear. Follow the instructions on the sealant product for the best results.
Before applying the fabric sealant, make sure the painted areas are clean and free from any dust or debris. You can gently wipe them with a soft cloth or a brush to remove any particles that may interfere with the sealant’s adhesion.
Shake the fabric sealant bottle well to ensure that the product is thoroughly mixed. Then, apply a thin and even layer of the sealant over the painted areas using a brush or a sponge applicator. Make sure to cover the entire surface, including the edges of the painted squares.
Allow the sealant to dry according to the instructions provided by the manufacturer. This may take a few hours or overnight, depending on the specific product. Avoid touching or wearing the shoes until the sealant is fully dry to prevent smudging or compromising its effectiveness.
Once the sealant is dry, your restored checkered Vans are ready to be worn and admired. The paint and sealant will provide durability and protection, allowing you to enjoy your revived shoes for a long time to come.
Maintenance Tips for Your Restored Vans
Congratulations on successfully restoring your faded checkered Vans! Now, to keep them looking vibrant and fresh, follow these maintenance tips:
Proper Cleaning Techniques
When cleaning your restored Vans, avoid using harsh detergents or scrubbing them vigorously. Instead, opt for a gentle cleaner specifically designed for sneakers. Use a soft brush or cloth to remove any dirt or stains, and let them air dry naturally.
Storing Your Vans Correctly
When not wearing your checkered Vans, store them in a cool and dry place away from direct sunlight. Avoid crumpling or folding them, as it can lead to creases and damage the paintwork. If possible, stuff them with tissue paper to help maintain their shape.
Regular Touch-ups to Maintain Vibrancy
Over time, even well-maintained Vans may require touch-ups to maintain their vibrancy. Keep extra fabric paint on hand in case you need to fill in any faded areas or touch up the checkered pattern. Follow the same painting and sealing process as before for consistent results.
By following these steps and implementing proper maintenance, your checkered Vans can stay vibrant and stylish for a long time. So, why wait? Get ready to rock your restored sneakers with confidence!