Are you having trouble with a stripped door hinge? Don’t worry, you’re not alone. This common problem can be frustrating, but with a few simple steps, you can easily fix it yourself. In this article, we’ll guide you through the process of repairing a stripped door hinge and preventing future problems. So let’s get started!
Understanding the Problem: Stripped Door Hinges
Before diving into the repair process, it’s important to understand what a stripped door hinge is and the common causes behind it.
When it comes to home maintenance, one of the most frustrating issues to deal with is a stripped door hinge. You know the feeling – you go to open or close a door, only to find that it’s sagging or misaligned. It’s a nuisance that can disrupt the flow of your daily life and even compromise the security of your home.
What is a Stripped Door Hinge?
A stripped door hinge refers to a hinge that no longer securely holds in place due to damage or wear on the screw holes. It’s a problem that can affect both interior and exterior doors, and if left unaddressed, it can lead to further damage and costly repairs.
Imagine trying to close your front door after a long day at work, only to find that it won’t latch properly. You push and pull, but it just won’t budge. Frustration sets in as you realize that the door hinge is stripped, causing the door to sag and preventing it from closing properly. It’s a situation that no homeowner wants to face, but unfortunately, it’s a common issue that many people have to deal with.
Common Causes of Stripped Door Hinges
Several factors can contribute to the stripping of door hinge screw holes. Over time, repeated use and pressure can loosen the screws, causing the screw holes to become worn or enlarged. This can happen in both wooden and metal doors, as the constant movement and weight can take a toll on the hinge.
But it’s not just wear and tear that can lead to stripped door hinges. Sometimes, the problem lies in the type or size of screws that are used. Using screws that are too short or too narrow for the hinge can cause them to easily come loose and strip the screw holes. It’s important to use the right size and type of screws when installing or replacing door hinges to ensure a secure and long-lasting fit.
Another common cause of stripped door hinges is improper installation. If the screws are not tightened properly or if they are overtightened, it can weaken the screw holes and lead to stripping. It’s crucial to follow the manufacturer’s instructions and use the correct tools when installing door hinges to avoid this issue.
Furthermore, environmental factors can also play a role in the stripping of door hinges. Moisture, humidity, and temperature fluctuations can cause the wood or metal around the screw holes to expand and contract, putting additional stress on the screws and eventually leading to stripping.
Overall, understanding the common causes of stripped door hinges is essential in order to prevent and address this frustrating problem. By taking the necessary precautions and using the right materials and techniques, you can ensure that your door hinges remain secure and functional for years to come.
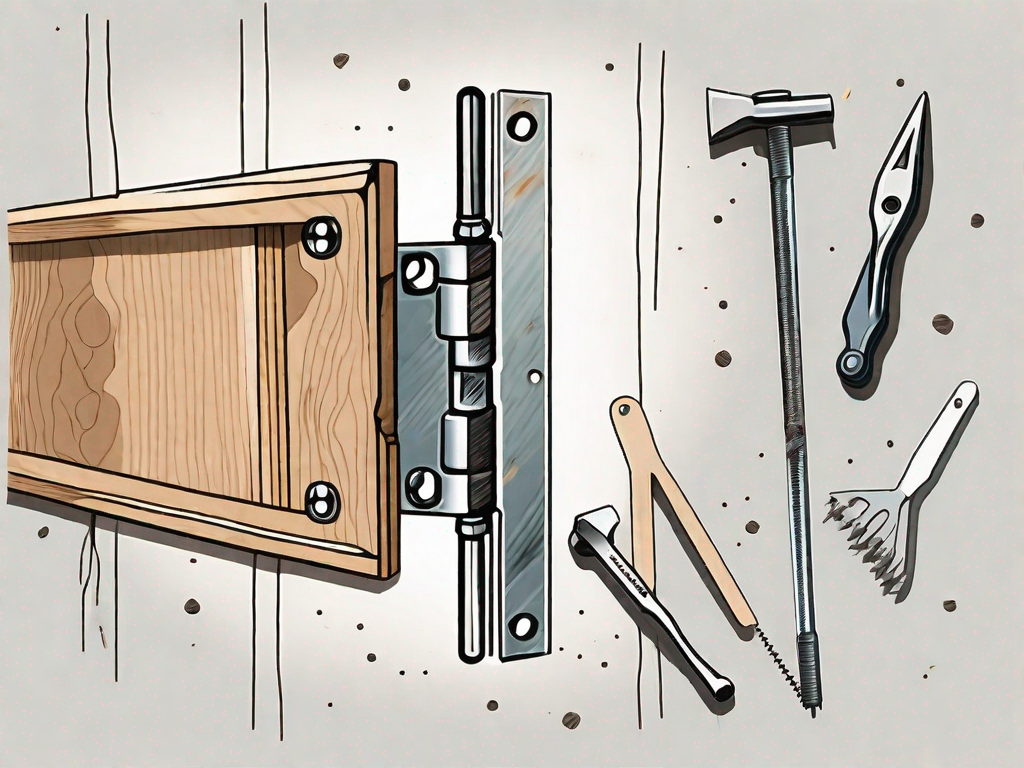
Tools Needed for the Repair
Before you begin the repair, gather the necessary tools to ensure a smooth process. Having the right tools on hand will make the task easier and more efficient.
Basic Tools for Every Homeowner
For this repair, you’ll need some basic tools that every homeowner should have in their toolbox. These tools come in handy for various projects around the house, not just door hinge repair:
- Screwdriver (Phillips or flathead, depending on the screw type) – A versatile tool that can be used for many tasks, from tightening screws to removing them.
- Hammer – Essential for driving nails or gently tapping objects into place.
- Drill – Useful for drilling holes or driving screws with precision.
- Drill bits – Different drill bits are required for various materials, so make sure you have a set that covers your needs.
- Tape measure – Accurate measurements are crucial for a successful repair, so having a tape measure is essential.
Specialized Tools for Door Hinge Repair
In addition to the basic tools, you’ll also need a few specialized tools specifically for repairing door hinges. These tools are designed to address the unique challenges that come with fixing hinges:
- Hinge repair kit (includes screws and inserts) – This kit contains all the necessary components to fix a damaged hinge, including replacement screws and inserts.
- Wood glue – Sometimes, a loose hinge can be fixed by applying wood glue to strengthen the connection between the hinge and the door frame.
- Wood toothpicks or matchsticks – These small wooden pieces can be used to fill in stripped screw holes, providing a solid base for the screws to grip onto.
- Chisel – A chisel may be needed to remove excess wood or make slight adjustments to the hinge mortise, ensuring a proper fit.
By having these specialized tools at your disposal, you’ll be well-prepared to tackle any door hinge repair job that comes your way. Remember to always follow safety guidelines and take your time to ensure a thorough and long-lasting repair.
Preparing for the Repair
Before you begin the repair process, it’s important to take some safety measures and carefully assess the damage. This will ensure that you approach the repair with the necessary precautions and have a clear understanding of the extent of the problem.
When it comes to repairing a stripped hinge, there are a few key steps you need to follow to ensure a successful outcome. By taking the time to prepare properly, you can avoid any potential accidents and make the repair process smoother.
Safety Measures to Consider
Whenever working with tools or performing repairs, safety should be your top priority. It’s crucial to protect yourself and create a safe working environment. Here are some safety measures to consider:
- Wear safety goggles: Protect your eyes from any flying debris or particles that may be released during the repair process. Safety goggles provide a barrier between your eyes and any potential hazards.
- Use gloves to protect your hands: Gloves not only provide a better grip on tools but also protect your hands from sharp edges or any potential injuries. Choose gloves that are suitable for the type of repair you are undertaking.
- Clear the surrounding area of any obstacles: Before you start the repair, make sure the area around the hinge is clear of any objects or obstacles. This will prevent any accidents or tripping hazards while you work.
- Ensure proper ventilation in the room: If you are working in an enclosed space, it’s important to have proper ventilation. This will help to dissipate any fumes or dust that may be generated during the repair process, ensuring a healthier and safer environment.
Assessing the Damage
Before jumping into fixing the stripped hinge, it’s essential to carefully examine the screw holes and determine the extent of the damage. This will help you make an informed decision on the best course of action and whether additional repairs or replacements are necessary.
Start by inspecting the screw holes closely. Look for any signs of wear, such as elongated or enlarged holes, splintering wood, or loose screws. If the wood around the screw holes is severely damaged, it may not hold the screws securely, even after the repair.
If the damage is minor, you can proceed with repairing the stripped hinge. However, if the wood is extensively damaged or the hinge is beyond repair, you may need to consider more extensive repairs or even replace the door or hinge altogether. It’s important to assess the overall condition of the hinge and the door to ensure a long-lasting and effective repair.
By carefully assessing the damage, you can make an informed decision on the best approach to take, saving you time and effort in the long run.
Step-by-Step Guide to Fixing a Stripped Door Hinge
Now that you have all the necessary tools and have prepared for the repair, let’s dive into the step-by-step process of fixing a stripped door hinge.
Removing the Damaged Hinge
The first step is to remove the damaged hinge from the door and frame. Use the screwdriver to carefully unscrew the hinge screws and set them aside.
As you remove the screws, take a moment to inspect them. Are they rusty or worn? If so, it may be a good idea to replace them with new screws to ensure a secure and long-lasting repair.
Once the screws are removed, gently lift the hinge away from the door and frame. Take note of any damage or wear on the hinge itself. If the hinge is also damaged, it may be necessary to replace it entirely.
Repairing the Stripped Hole
Once the hinge is removed, it’s time to repair the stripped screw holes. Here’s what you need to do:
- Apply wood glue to the stripped screw holes. The wood glue will help strengthen the wood fibers and provide a solid base for the repair.
- Take wooden toothpicks or matchsticks and insert them into the holes, breaking them off flush with the surface. The toothpicks or matchsticks act as wooden dowels, filling the stripped holes and creating new anchor points for the screws.
- Let the wood glue dry completely. This may take several hours, so be patient and allow enough time for the glue to fully set.
- Using a chisel or utility knife, carefully trim any excess wood from the surface. This step ensures that the repaired area is flush with the surrounding wood, allowing the hinge to sit evenly.
Take a moment to admire your handiwork. The repaired screw holes should now be strong and ready to support the weight of the door without any issues.
Reinstalling the Door Hinge
Now that the stripped screw holes have been repaired, it’s time to reinstall the door hinge. Follow these steps:
- Place the hinge back onto the door and frame. Ensure that it is positioned correctly and aligns with the existing screw holes.
- Insert the new screws from the hinge repair kit into the repaired screw holes. The new screws should be slightly longer than the original ones to ensure a secure fit in the repaired wood.
- Tighten the screws using a screwdriver or drill, but be careful not to overtighten. Over-tightening the screws can cause the wood to split or the hinge to become misaligned.
Once the screws are tightened, test the door to ensure it opens and closes smoothly. If there are any issues, such as sticking or misalignment, you may need to make further adjustments to the hinge or consult a professional for assistance.
With the door hinge repaired and securely in place, you can now enjoy a properly functioning door once again. Take pride in your DIY skills and the money you saved by fixing the hinge yourself!
Preventing Future Hinge Problems
Now that you’ve successfully fixed the stripped door hinge, it’s important to take preventive measures to avoid similar issues in the future.
Regular Maintenance Tips
To keep your door hinges in good condition, consider implementing these maintenance practices:
- Tighten loose screws regularly
- Periodically lubricate the hinges with a suitable lubricant
- Check for any signs of wear or damage and address them promptly
When to Consider Professional Help
In some cases, the damage to the door hinge may be too severe or require specialized expertise. If you’re uncertain about your abilities or the extent of the damage, it’s always wise to consult a professional for assistance.
By following these steps and taking preventive measures, you can easily fix a stripped door hinge and ensure your doors function smoothly for years to come. Remember, proper maintenance and timely repairs are key to keeping your hinges in good shape. Good luck with your repair!