Snap buttons are a convenient and popular way to fasten clothing, bags, and accessories. However, over time, snap buttons can become loose or even break. While this can be frustrating, the good news is that fixing a snap button is a relatively simple process that you can do yourself at home.
In this step-by-step guide, we will walk you through the process of fixing a snap button, as well as provide tips for maintaining them to avoid common issues in the future.
Understanding the Anatomy of a Snap Button
Before we dive into the repair process, it is essential to familiarize yourself with the anatomy of a snap button. Snap buttons consist of two primary parts: the socket and the stud. The socket is the female part that receives the stud, which is the male part. When the two pieces are pressed together, they create a secure fastening.
Now, let’s take a closer look at each part of a snap button. The socket, also known as the female part, is typically a hollow ring with a lip on the top. It is designed to receive the stud, allowing the two pieces to interlock when pressed together. The socket is usually attached to the fabric using prongs, which secure it in place.
The stud, on the other hand, is the male part of the snap button. It consists of a solid post with a rounded head that fits snugly into the socket. When the stud is inserted into the socket and pressed, it creates a firm connection, keeping the fabric securely fastened.
Identifying Different Types of Snap Buttons
There are various types of snap buttons available, each with its own unique design and functionality. One common type is the prong ring snap, which features a ring-shaped socket with prongs that pierce through the fabric to secure the snap button. This type of snap button is commonly used in clothing, bags, and accessories.
Another type of snap button is the cap snap, which consists of a socket and stud with a decorative cap that covers the prongs. Cap snaps are often used in garments where aesthetics are important, as the cap adds a stylish touch to the button.
Lastly, we have sew-on snaps, which are typically used in situations where the fabric is too thick or delicate to accommodate prongs. Sew-on snaps require stitching to attach them to the fabric, providing a secure fastening option without the need for piercing the material.
It is crucial to identify the specific type of snap button you are working with to ensure you follow the correct repair method. Different types of snap buttons may require different tools and techniques, so it’s important to have a clear understanding of the snap button’s design before proceeding with any repairs.
Recognizing the Parts of a Snap Button
In addition to the socket and stud, snap buttons also consist of other parts that play a crucial role in their functionality. One of these parts is the prong, which is a small metal piece that extends from the socket. The prong is responsible for securing the snap button to the fabric by piercing through it and bending to hold the button in place.
Another important part of a snap button is the cap. The cap is a decorative cover that fits over the prong, adding aesthetic value to the button. Caps come in various shapes, sizes, and designs, allowing for customization and personalization of snap buttons. They can be made from different materials such as plastic, metal, or fabric, depending on the desired look and functionality.
Understanding these components will help you visualize the repair process and make informed decisions when it comes to fixing or replacing snap buttons. Whether you need to replace a broken socket, repair a loose prong, or update the cap for a fresh look, having a comprehensive understanding of the parts involved will ensure a successful repair.
Gathering Necessary Tools for Snap Button Repair
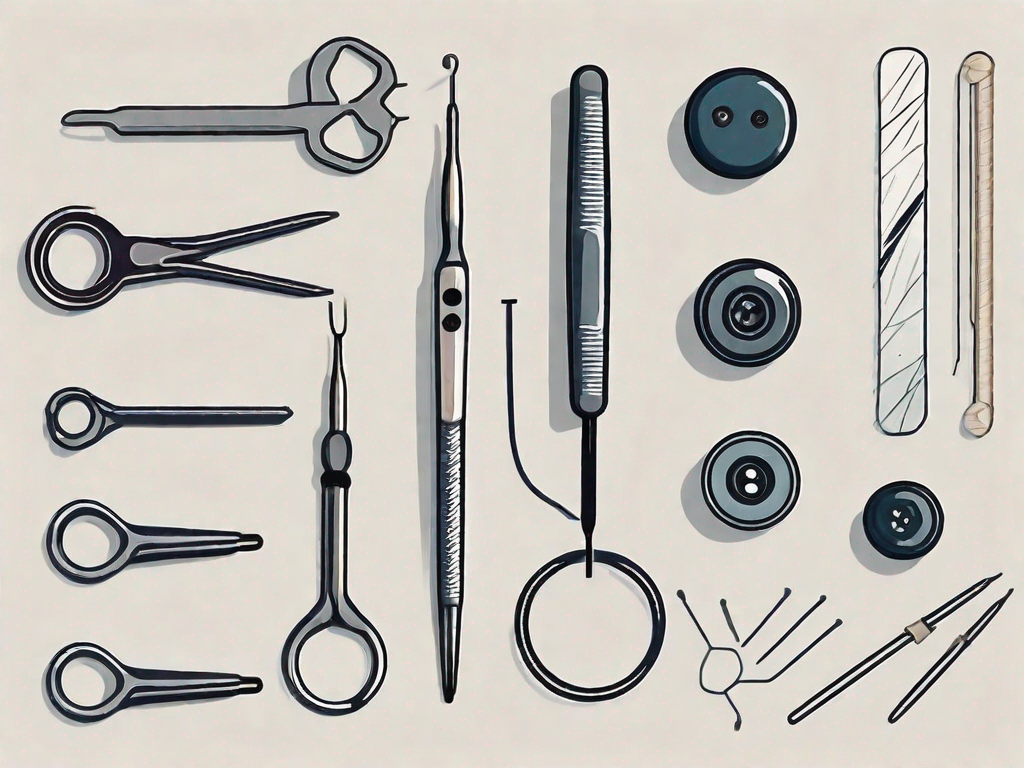
Before you begin the repair process, it is essential to gather the necessary tools. Here are some tools you may need:
Essential Tools for Snap Button Repair
- A snap button repair kit, which typically includes replacement snap buttons, a snap setter, and an anvil.
- A pair of pliers, preferably needle-nose pliers.
- A small hammer.
- A seam ripper, if necessary for removing the old snap button.
- A fabric marker.
- Scissors.
- A cutting mat or surface to protect your work area.
Now that you have gathered the essential tools for snap button repair, let’s delve into some additional details about each tool:
1. Snap Button Repair Kit
A snap button repair kit is a must-have for any snap button repair project. It typically includes replacement snap buttons, a snap setter, and an anvil. The replacement snap buttons come in various sizes and styles to match your specific needs. The snap setter is a tool used to secure the snap buttons in place, while the anvil provides a solid surface for hammering the snap buttons into position.
2. Pliers
Needle-nose pliers are the preferred choice for snap button repair due to their slim and pointed jaws. These pliers allow for precise gripping and manipulation of the snap buttons. They are essential for attaching and adjusting the snap buttons during the repair process.
3. Small Hammer
A small hammer is necessary for hammering the snap buttons into place. It should be lightweight and easy to handle. The hammer’s size and weight ensure that the snap buttons are securely fastened without damaging the fabric or the snap button itself.
4. Seam Ripper
If you need to remove the old snap button before replacing it, a seam ripper will come in handy. This tool allows you to carefully cut through the stitches holding the snap button in place, making it easier to remove without damaging the fabric. It is important to exercise caution while using a seam ripper to avoid any accidental cuts.
5. Fabric Marker
A fabric marker is useful for marking the exact placement of the snap buttons on the fabric. It ensures that the snap buttons are aligned correctly and evenly spaced. A fabric marker with a fine tip is recommended for precise marking.
6. Scissors
Scissors are essential for cutting any excess fabric or thread during the repair process. They should be sharp and capable of cutting through various types of fabric. Make sure to use them carefully to avoid any accidental cuts or snags.
7. Cutting Mat or Surface
Using a cutting mat or surface is crucial to protect your work area from scratches and cuts. It provides a stable and safe surface for cutting, hammering, and manipulating the snap buttons. Ensure that the cutting mat or surface is large enough to accommodate your project and is made of a material that won’t damage the tools or the fabric.
Safety Precautions When Using Tools
When working with tools, it is essential to take safety precautions. Always wear safety goggles to protect your eyes from any potential flying debris. Additionally, make sure to work in a well-ventilated area and take breaks if needed to prevent strain or discomfort. Safety should always be a top priority when engaging in any repair project.
Steps to Fix a Loose Snap Button
If you have a loose snap button, follow these steps to tighten it:
Preparing the Snap Button for Repair
1. Identify the loose snap button on your garment or accessory. Use a fabric marker to mark its exact location for easier reference.
2. Place a cutting mat or surface on your work area to protect it from any damage.
3. Using a seam ripper, carefully remove the loose snap button. Be cautious not to rip or damage the fabric in the process.
4. Inspect the prongs on the snap button to determine if they are bent or misshapen. If so, use pliers to reshape them to their original form.
Tightening the Snap Button
1. Take one half of the snap button (either the socket or the stud) and place it on the anvil, with the prongs facing up.
2. Position the loose snap button over the prongs of the snap button on the anvil, ensuring they align correctly.
3. Using a small hammer or a snap setter, gently tap the prongs of the loose snap button to secure them onto the existing snap button. Continue tapping until the two pieces are securely fastened together.
4. Repeat the process for the other half of the snap button, ensuring it aligns perfectly with the first half.
5. Test the snap button by applying gentle pressure to ensure it is securely fastened. If needed, make any necessary adjustments.
Steps to Replace a Broken Snap Button
If your snap button is broken and needs to be replaced, follow these steps:
Removing the Broken Snap Button
1. Identify the broken snap button on your garment or accessory.
2. Use pliers or a seam ripper to carefully remove the prongs of the broken snap button from the fabric. Take extra caution not to damage the fabric in the process.
3. Inspect the fabric to ensure there are no remnants of the broken snap button left behind.
Installing the New Snap Button
1. Take one half of the new snap button (either the socket or the stud) and position it on the fabric, ensuring it aligns with the corresponding half of the snap button.
2. Insert the prongs of the new snap button through the fabric and fold them over using pliers to secure them in place.
3. Repeat the process for the other half of the snap button, ensuring it aligns perfectly with the first half.
4. Test the new snap button to ensure it is securely fastened and functioning properly.
Tips for Maintaining Snap Buttons
Maintaining your snap buttons is essential to ensure their longevity and prevent future issues. Here are some tips to keep in mind:
Regular Maintenance for Snap Buttons
- Periodically check your snap buttons for any signs of wear or damage.
- Ensure that the prongs are securely fastened to the fabric.
- Keep snap buttons clean by gently wiping them with a damp cloth.
- Avoid exposing snap buttons to excessive heat or pressure, as this can cause damage or deformation.
- If a snap button becomes loose, tighten it as soon as possible to prevent further damage.
Avoiding Common Snap Button Issues
In addition to regular maintenance, there are some common issues you can avoid:
- Avoid pulling or tugging on snap buttons excessively, as this can lead to the prongs becoming bent or detached.
- Be cautious when washing or drying garments with snap buttons. Follow the manufacturer’s instructions to prevent damage.
- Check the alignment of snap buttons before fastening them to ensure a proper connection.
- If a snap button becomes damaged beyond repair, replace it promptly to maintain the functionality of your garment or accessory.
By following these steps and tips, you can easily fix a loose or broken snap button and maintain the functionality of your clothing, bags, and accessories. With a little practice and the right tools, you’ll be a snap button repair expert in no time!