Silicone bracelets are popular accessories that can be worn for various reasons, from fashion statements to awareness of a cause. However, like any other piece of jewelry, they are not immune to wear and tear. Fortunately, you can easily fix a silicone bracelet with a few simple steps. In this comprehensive guide, we will walk you through the process of repairing your silicone bracelet, ensuring that it looks as good as new. Let’s get started!
Understanding the Basics of Silicone Bracelets
Before diving into the repair process, it’s essential to understand what a silicone bracelet is and the common issues that may arise. Silicone bracelets are made from a flexible and durable material called silicone, which is resistant to water and heat. They are often used to promote awareness of various causes or as fashion accessories.
Silicone bracelets have become increasingly popular in recent years due to their versatility and comfort. The soft and lightweight nature of silicone makes these bracelets comfortable to wear for extended periods, unlike some other materials that can cause discomfort or irritation.
What is a Silicone Bracelet?
A silicone bracelet is a wristband made from silicone rubber. It is known for its soft and lightweight nature, making it comfortable to wear for extended periods. These bracelets are available in different colors, designs, and sizes to cater to individual preferences.
One of the key advantages of silicone bracelets is their ability to be customized. They can be embossed or debossed with various messages, logos, or symbols, allowing individuals or organizations to promote a cause or express their personal style. This customization option has contributed to the popularity of silicone bracelets as a form of self-expression.
Common Issues with Silicone Bracelets
While silicone bracelets are durable, they can still experience wear and tear over time. Common issues include tears, broken clasps, and discoloration. Fortunately, these problems are fixable, and it’s always a good idea to repair your bracelet instead of replacing it.
Tears in silicone bracelets can occur due to excessive stretching or accidental snags. However, repairing a tear is relatively simple and can be done using adhesive specifically designed for silicone materials. By applying a small amount of adhesive to the tear and allowing it to dry, you can restore the bracelet’s integrity and continue wearing it with confidence.
Broken clasps are another common issue with silicone bracelets. The clasps may become loose or break entirely, making it difficult to fasten the bracelet securely. In such cases, replacing the clasp is often the best solution. Many jewelry stores or online retailers offer replacement clasps specifically designed for silicone bracelets, allowing you to easily fix the problem and continue wearing your favorite accessory.
Discoloration is a natural occurrence that can happen to any silicone bracelet over time. Exposure to sunlight, sweat, and certain chemicals can cause the bracelet to fade or change color. While discoloration may be unavoidable, there are steps you can take to minimize its impact. Regularly cleaning your bracelet with mild soap and water can help remove dirt and grime that contribute to discoloration. Additionally, storing your bracelet in a cool and dry place when not in use can help slow down the fading process.
Understanding the basics of silicone bracelets and the common issues that may arise is crucial for maintaining and prolonging the lifespan of your favorite accessory. By being aware of how to repair tears, replace broken clasps, and prevent discoloration, you can continue to enjoy the beauty and functionality of your silicone bracelet for years to come.
Gathering the Necessary Tools
To repair your silicone bracelet effectively, you’ll need a few essential tools. These tools ensure that you can carry out the repair process smoothly and efficiently.
Repairing a silicone bracelet can be a simple and cost-effective way to extend the life of your favorite accessory. Whether it’s a sentimental piece or a trendy fashion statement, having the right tools at your disposal will make the repair process a breeze.
Essential Tools for Silicone Bracelet Repair
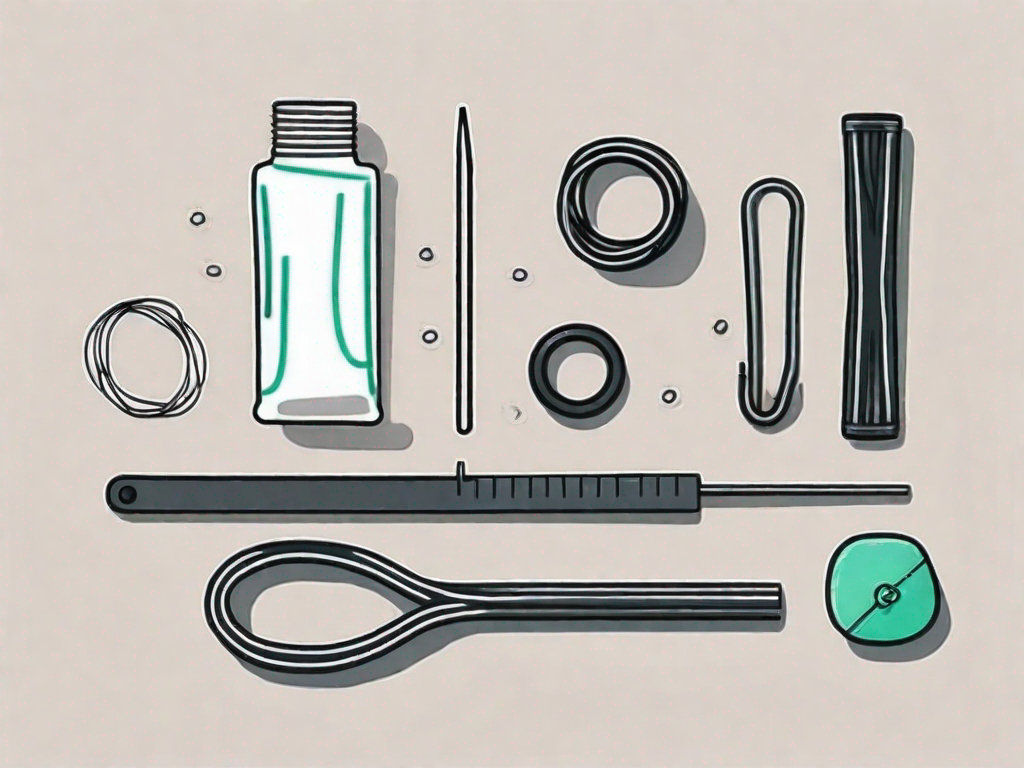
The tools you will need for repairing your silicone bracelet include:
- A small pair of scissors or a craft knife: These tools will come in handy when you need to trim excess silicone or make precise cuts during the repair process. Ensure that the scissors or craft knife are sharp to achieve clean and accurate results.
- A silicone adhesive or glue specifically designed for jewelry: Choosing the right adhesive is crucial for a successful repair. Look for a silicone adhesive that is specifically formulated for jewelry repairs, as it will provide a strong and durable bond without damaging the bracelet.
- A soft cloth for cleaning: Before applying the adhesive, it’s essential to clean the bracelet thoroughly. A soft cloth will help remove any dirt, dust, or residue that may affect the bonding process. Ensure that the cloth is lint-free to avoid leaving behind any unwanted particles.
- A toothpick or a small stick for applying adhesive: Precise application of the adhesive is key to achieving a seamless repair. A toothpick or a small stick can be used to apply the adhesive to the damaged area without making a mess. It allows for better control and ensures that the adhesive is evenly distributed.
Safety Precautions When Handling Tools
When handling tools, it’s important to take safety precautions. Make sure to work in a well-ventilated area to avoid inhaling any fumes from the adhesive. If possible, open windows or use a fan to improve air circulation.
Additionally, it’s crucial to avoid direct contact between the adhesive and your skin or eyes. Some adhesives may contain chemicals that can cause irritation or allergic reactions. Wearing protective gloves and safety goggles can help minimize the risk of accidental contact.
Furthermore, it’s essential to keep the tools out of reach of children. The sharp edges of scissors or craft knives can pose a danger, and the adhesive should never be handled by young children. Store the tools in a secure place to prevent accidents and ensure the safety of everyone in your household.
By following these safety precautions, you can confidently repair your silicone bracelet without compromising your well-being or the quality of the repair.
Preparing Your Silicone Bracelet for Repair
Before starting the repair process, it’s essential to prepare your silicone bracelet. This involves cleaning it and assessing the damage.
When it comes to silicone bracelets, proper maintenance is crucial to ensure their longevity. Over time, these bracelets can accumulate dirt, sweat, and other debris, making them look dull and worn out. By cleaning your bracelet regularly, you can keep it looking fresh and vibrant.
Cleaning Your Silicone Bracelet
To clean your bracelet, you’ll need a few simple supplies. Start by mixing a mild detergent, such as dish soap or hand soap, with warm water in a bowl. The warm water helps to loosen any dirt or grime on the bracelet’s surface.
Next, take a soft cloth or sponge and dip it into the soapy water. Gently scrub the entire surface of the bracelet, paying extra attention to any areas that appear particularly dirty. Be sure to clean both the inside and outside of the bracelet to remove any trapped debris.
Once you’ve thoroughly scrubbed the bracelet, rinse it under cool running water to remove any soap residue. Make sure to rinse all the nooks and crannies to ensure a complete clean. Avoid using hot water, as it can cause the silicone to warp or lose its shape.
After rinsing, pat the bracelet dry with a clean towel or let it air dry. Avoid using a hairdryer or any other heat source, as excessive heat can damage the silicone material.
Once your bracelet is clean, it’s time to move on to the next step in the preparation process.
Assessing the Damage
Now that your bracelet is clean and refreshed, it’s essential to carefully assess the damage. Take a close look at the bracelet to identify any areas that require repair.
Start by examining the surface of the bracelet for any visible signs of damage, such as tears, scratches, or discoloration. These issues can often be addressed with simple repair techniques.
Next, check the clasps or closures of the bracelet. Over time, these can become loose or damaged, compromising the bracelet’s overall functionality. If you notice any issues with the clasps, make a note of them for the repair process.
Additionally, pay attention to any other components of the bracelet, such as charms or decorative elements. Sometimes, these can become loose or detached, requiring reattachment or replacement.
By thoroughly assessing the damage, you’ll have a clearer understanding of the repairs needed and can proceed with confidence to restore your silicone bracelet to its former glory.
The Repair Process
Now that you’ve gathered the necessary tools and prepared your bracelet, it’s time to proceed with the repair process. The following step-by-step guide will assist you in fixing tears and repairing broken clasps.
Step-by-Step Guide to Fixing a Tear
If your silicone bracelet has a tear, here’s how you can repair it:
- Clean the torn area with a mild detergent and warm water.
- Ensure the torn edges are aligned properly.
- Apply a small amount of silicone adhesive along the tear line, using a toothpick or a small stick to spread it evenly.
- Press the torn edges together firmly and hold them in place for a few minutes to allow the adhesive to dry.
- Leave the repaired bracelet undisturbed for the recommended drying time mentioned on the adhesive packaging.
How to Repair a Broken Clasp
If the clasp of your silicone bracelet is broken, follow these steps for repair:
- Clean the broken clasp area, ensuring it is free from any dirt or debris.
- Apply a small amount of silicone adhesive to one half of the broken clasp.
- Press the matching half of the clasp firmly against the adhesive, ensuring they align correctly.
- Hold the clasp in place for a few minutes to allow the adhesive to set.
- Once the adhesive is dry, test the clasp to ensure it securely fastens.
Post-Repair Care for Your Silicone Bracelet
After successfully repairing your silicone bracelet, it’s crucial to take care of it properly to maintain its condition and longevity.
Cleaning and Storing Your Bracelet Post-Repair
Regularly clean your bracelet using a mild detergent and warm water to remove any dirt or residue. After cleaning, dry it thoroughly before storing it in a cool and dry place. Avoid exposing your bracelet to harsh chemicals or extreme temperatures to prevent damage.
Tips for Maintaining Your Silicone Bracelet
To ensure your silicone bracelet remains in good condition, consider the following tips:
- Avoid wearing your bracelet while engaging in activities that may cause excessive stretching or pulling.
- Remove your bracelet before swimming, exercising, or using substances like lotion or sunscreen.
- Regularly inspect your bracelet for any signs of damage, and promptly address any issues to prevent further deterioration.
Repairing a silicone bracelet is a simple and cost-effective solution to extend its lifespan and maintain its aesthetic appeal. By following these step-by-step instructions and implementing proper care practices, you can enjoy your silicone bracelet for years to come!