Have you ever encountered a pump bottle that simply refuses to cooperate? It can be frustrating, especially when you’re in dire need of that luxurious hand lotion or refreshing face mist. But fear not, because in this comprehensive guide, we will walk you through the steps to fix a pump bottle that won’t pop up. So, let’s dive in and unravel the mysteries of pump bottle mechanisms!
Understanding the Mechanism of a Pump Bottle
Pump bottles are a marvel of engineering, designed to dispense liquids with ease. Whether it’s your favorite hand lotion, shampoo, or soap, pump bottles have become an essential part of our daily lives. But have you ever wondered how these ingenious devices work? Let’s delve into the intricate mechanism of a pump bottle to comprehend why it sometimes malfunctions.
At first glance, a pump bottle may seem like a simple contraption, but it’s actually a well-thought-out system of various components working together seamlessly. To truly understand the inner workings of a pump bottle, it’s essential to grasp the role each component plays in its operation.
The Role of Each Component in a Pump Bottle
A pump bottle consists of several key components, each serving a specific purpose. Let’s take a closer look at these components:
1. Pump Head: The pump head acts as the control center of the pump bottle. It determines whether the liquid flows or stagnates. With a simple press or push, the pump head initiates the dispensing process, allowing the liquid to be released.
2. Dip Tube: Extending from the pump head into the liquid, the dip tube plays a crucial role in drawing up the liquid. When the pump head is pressed, it creates a vacuum that pulls the liquid up through the dip tube and into the pump mechanism.
3. Spring: The spring is a small yet mighty component that ensures the proper functioning of the pump bottle. It creates the necessary pressure within the pump mechanism, allowing the liquid to be dispensed smoothly. Without the spring, the pump bottle would struggle to deliver the desired amount of liquid with each press.
4. Piston: The piston is responsible for sealing the pump head, preventing any leakage when the pump bottle is not in use. It forms a tight seal, ensuring that the liquid remains inside the bottle until it is dispensed.
5. Bottle: Last but not least, the bottle itself plays a crucial role in the functionality of the pump bottle. It holds the liquid and serves as the structural foundation for the other components. The bottle’s design and material are carefully chosen to ensure durability and compatibility with the liquid being dispensed.
Now that we have a better understanding of the different components, let’s explore some common reasons why pump bottles may fail to dispense liquid smoothly.
Common Reasons Why Pump Bottles Fail
While pump bottles are generally reliable, they can encounter various issues that prevent them from dispensing with finesse. Here are some common culprits:
1. Airlocks: Sometimes, air can get trapped in the pump mechanism, causing a disruption in the flow of liquid. This can result in inconsistent or no dispensing at all. To fix this issue, you can try priming the pump by pressing it a few times until the air is expelled.
2. Clogged Pump Heads: Over time, pump heads can become clogged with residue or dried-up product, hindering the smooth flow of liquid. Regular cleaning and maintenance can help prevent this issue. Simply remove the pump head, rinse it thoroughly, and ensure all the pathways are clear before reattaching it.
3. Broken Springs: The spring is a vital component that creates the necessary pressure for the pump bottle to function correctly. If the spring becomes damaged or loses its elasticity, it can lead to poor dispensing performance. In such cases, replacing the spring is usually the best solution.
4. Damaged Pistons: The piston’s role in sealing the pump head is crucial to prevent leakage. If the piston becomes worn out or damaged, it may fail to create a proper seal, resulting in leaks or inconsistent dispensing. Replacing the piston can often resolve this issue.
By identifying the root cause of a pump bottle malfunction, you can implement targeted solutions to restore its functionality. Regular maintenance, proper cleaning, and replacing worn-out components are key to ensuring that your pump bottle continues to dispense your favorite liquids smoothly.
Preliminary Steps Before Fixing a Pump Bottle
Before we delve into repairs, it’s crucial to prioritize safety and gather the necessary tools for the job. After all, a successful repair begins with proper preparation.
Fixing a pump bottle can be a simple task if you follow the right steps. By taking the time to understand the process and gather the required tools, you can save yourself from the frustration of a malfunctioning pump.
Safety Measures to Consider
First and foremost, ensure the pump bottle is empty before attempting any repairs. This prevents the risk of spills or exposure to hazardous substances. It’s always better to be safe than sorry when it comes to dealing with potentially harmful chemicals.
Additionally, protect your hands by wearing gloves to avoid contact with sharp edges or chemicals. Gloves not only provide a barrier between your skin and any harmful substances but also offer a better grip, making it easier to handle small parts during the repair process.
Remember, safety should always be your top priority. By taking these simple precautions, you can minimize the risk of accidents and ensure a smooth repair experience.
Tools Needed for the Repair
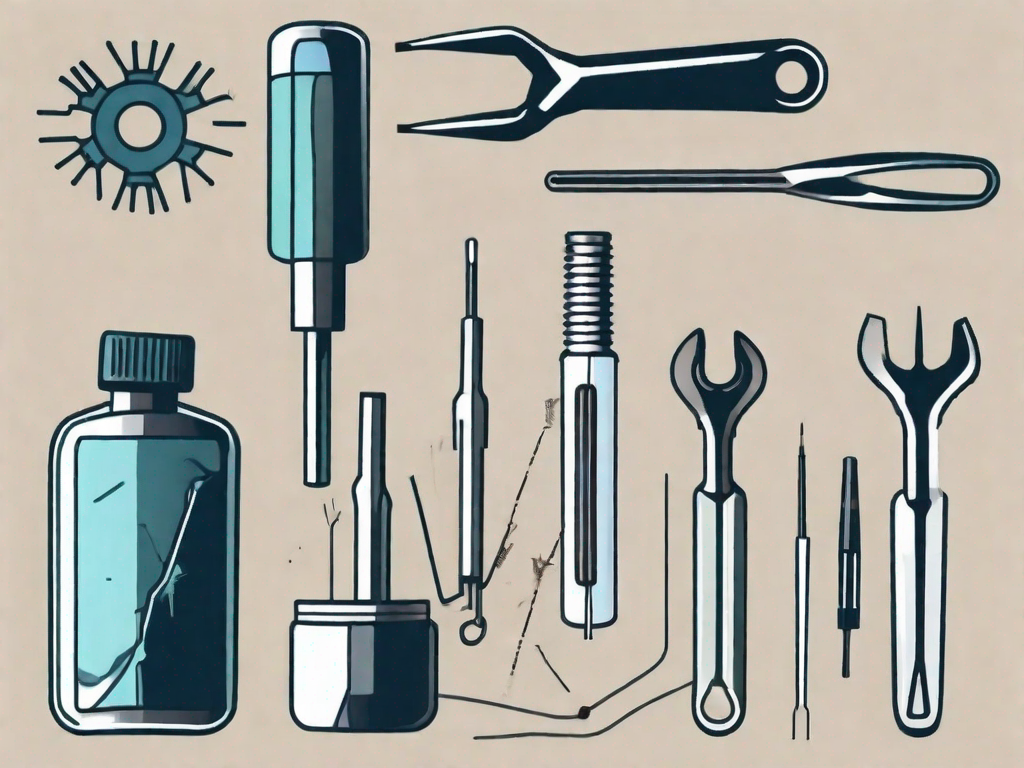
To rectify the issues plaguing your pump bottle, you’ll need a few tools readily available in most households. These tools are easy to find and can make the repair process much simpler.
Firstly, you’ll need tweezers or a needle. These tools come in handy when dealing with clogged or stuck parts. They allow you to carefully remove any debris or blockages that may be preventing the pump from functioning properly.
In addition to tweezers or a needle, a toothpick or pin can also be useful. These tools can help you dislodge any stubborn dirt or grime that may have accumulated inside the pump mechanism.
Warm water and dish soap are essential for cleaning the pump bottle thoroughly. By mixing a small amount of dish soap with warm water in a small bowl, you can create a gentle cleaning solution that will effectively remove any dirt or residue from the pump.
Finally, a clean cloth is necessary for drying and wiping down the pump bottle after cleaning. This will ensure that no moisture remains, preventing any potential damage to the pump mechanism.
By having these tools at your disposal, you’ll be well-prepared to tackle any issues that may arise with your pump bottle.
Step-by-Step Guide to Fixing a Pump Bottle That Won’t Pop Up
Now that you’re equipped with essential knowledge and tools, it’s time to take action and restore your pump bottle’s functionality. By following these steps diligently, you’ll soon be enjoying the convenience of a fully operational pump bottle.
Disassembling the Pump Bottle
The first step is to disassemble the pump bottle carefully. Depending on the design, you may need to unscrew the pump head or pry it off using a small tool. Be gentle yet firm to avoid causing further damage.
Once you have successfully disassembled the pump bottle, you’ll be able to see its inner workings. It’s like peering into the heart of the mechanism, where the magic happens. Take a moment to appreciate the engineering marvel before you proceed.
Identifying the Problem
Once disassembled, closely examine each component and pinpoint the underlying issue. Is the pump head clogged with residue? Has the spring lost its tension? Or maybe the dip tube has come loose? Understanding the problem is crucial for implementing the appropriate solution.
As you inspect the pump bottle, you might notice tiny specks of dirt or dried-up product clinging to the various parts. It’s a testament to the bottle’s hard work and dedication to serving you. Take a moment to marvel at its resilience.
Performing the Necessary Repairs
After identifying the issue, let’s move on to the required repairs. Here are a few common scenarios and their corresponding fixes:
- If the pump head is clogged, fill a small bowl with warm water and add a few drops of mild dish soap. Submerge the pump head in the solution and pump it several times to dislodge any debris. Rinse thoroughly with clean water and let it dry before reassembling.
- If the spring has lost its tension, carefully remove it from the pump head. Gently stretch it to restore its elasticity, then reattach it to the pump head. Ensure it sits properly before reassembly.
- If the dip tube has come loose, reinsert it securely into the pump head. Apply gentle pressure to ensure a tight fit.
While the pump head soaks in the soapy water, take a moment to appreciate the power of cleanliness. Just like how a clean mind leads to clarity, a clean pump head leads to smooth dispensing.
As you stretch the spring, think about how it symbolizes resilience and adaptability. It’s a reminder that even when things seem a little stretched, they can bounce back stronger than ever.
As you secure the dip tube back into place, think about how it represents stability and connection. Just like the tube ensures a continuous flow of product, it’s a reminder of the importance of staying connected to the things that matter in life.
By following these repair steps, you’re not only fixing a pump bottle but also honing your problem-solving skills. It’s a testament to your resourcefulness and determination to overcome obstacles. Remember, every repair is an opportunity for growth.
Tips to Prevent Future Pump Bottle Failures
Once you’ve successfully revived your pump bottle, it’s essential to maintain its optimal performance. By following these simple tips, you can significantly prolong its lifespan:
Proper Usage of Pump Bottles
When using a pump bottle, ensure that the bottle remains upright to prevent airlocks. Additionally, avoid excessive force when pressing the pump head, as it may cause damage.
Regular Maintenance and Cleaning
To prevent clogs, regularly clean the pump head by immersing it in warm, soapy water. Gently pump the head a few times, then rinse thoroughly. Dry all components before reassembling the pump bottle.
What to Do If Your Pump Bottle Still Won’t Work
If you’ve exhausted all repair options and your pump bottle remains unresponsive, it may be time to consider a replacement.
When to Consider Replacement
Replacement becomes necessary if the pump bottle is irreparable due to severe damage or if the costs of repair outweigh the benefits. Assess the situation objectively and make a practical decision based on your needs.
Choosing a Quality Replacement Pump Bottle
When selecting a replacement pump bottle, opt for reputed brands known for their durability and functionality. Read reviews, compare options, and choose wisely to ensure a smooth experience in the long run.
With our step-by-step guide and insightful tips, you are now equipped to troubleshoot and repair a pump bottle that won’t pop up. By understanding the mechanisms and taking preventative measures, you can ensure a seamless experience with your pump bottle. So, say goodbye to frustration and hello to hassle-free dispensing of your favorite liquids!