Having a lighter with a low flame can be frustrating, especially when you’re in need of a quick fire. However, understanding the problem and possessing the right tools can help you fix it in no time.
In this article, we will guide you through the process of troubleshooting and repairing a lighter with a low flame, ensuring that you have a properly functioning lighter at your disposal.
Understanding the Problem: Low Flame in Lighters
If you’re experiencing a low flame in your lighter, it’s important to understand the common causes behind this issue. By identifying the root cause, you can take appropriate measures to rectify the problem and restore your lighter to its optimal state.
When it comes to lighters, a strong and reliable flame is essential for various activities such as lighting candles, starting a campfire, or even enjoying a cigar. However, sometimes you may encounter a frustrating situation where the flame is weak and feeble, making it difficult to perform these tasks efficiently. To shed light on this issue, let’s explore the common causes of a low flame in lighters and the steps you can take to address them.
Common Causes of Low Flame in Lighters
There are several potential causes for a lighter’s low flame:
- Insufficient fuel: The most common reason for a low flame is a shortage of fuel. Lighters rely on butane gas to produce a strong flame, and if the fuel level is low, it can result in a weak flame or no flame at all. To address this issue, it’s crucial to check the fuel level and refill if necessary. Ensuring an adequate fuel supply is the first step towards restoring your lighter’s performance.
- Clogged burner holes: Over time, debris and residue can accumulate in the burner holes, obstructing the flow of butane and resulting in a weak flame. This can happen due to factors like dirt, dust, or even pocket lint finding its way into the lighter. Cleaning the burner holes can often resolve this issue. By using a small needle or a pin, gently clear any blockages in the burner holes to allow a smooth flow of butane. This simple maintenance step can make a significant difference in the strength of the flame.
- Misaligned flint wheel: The flint wheel plays a crucial role in igniting the fuel and creating a flame. However, a misaligned flint wheel can prevent proper ignition, leading to a weak flame. To address this issue, you can adjust the flint wheel alignment. Carefully examine the flint wheel and ensure it is properly aligned with the striker wheel. By making the necessary adjustments, you can restore the flint wheel’s functionality and enjoy a strong flame once again.
- Worn-out flint: The flint is a small but vital component of a lighter. It creates the sparks needed to ignite the fuel and produce a flame. However, over time, the flint can wear out, resulting in sparks that are too weak to ignite the fuel effectively. If you notice a low flame, it may be time to replace the flint. Fortunately, replacing the flint is a simple and effective solution. Most lighters have a flint compartment that can be accessed by removing the bottom or a small panel. Once you’ve replaced the flint, you should experience a significant improvement in the flame’s strength.
By understanding these common causes of a low flame in lighters, you can now take the necessary steps to troubleshoot and resolve the issue. However, before you embark on any repair work, it’s crucial to prioritize safety.
Safety Precautions Before Starting the Repair
Before diving into repairing your lighter, it’s crucial to prioritize safety. Take the following precautions to ensure your well-being:
- Work in a well-ventilated area to avoid inhaling any butane fumes. Proper ventilation is essential as butane gas can be harmful if inhaled in large quantities.
- Keep flammable materials away from the repair area. Since you’re dealing with a flammable substance, it’s important to minimize the risk of accidents. Make sure there are no flammable materials nearby that could potentially ignite.
- Ensure there are no open flames nearby. Open flames, such as candles or stoves, can pose a significant risk when working with lighters. Keep the repair area clear of any open flames to prevent accidents.
- Keep a fire extinguisher within reach, just in case. Although rare, accidents can happen. Having a fire extinguisher nearby can provide an extra layer of safety and peace of mind.
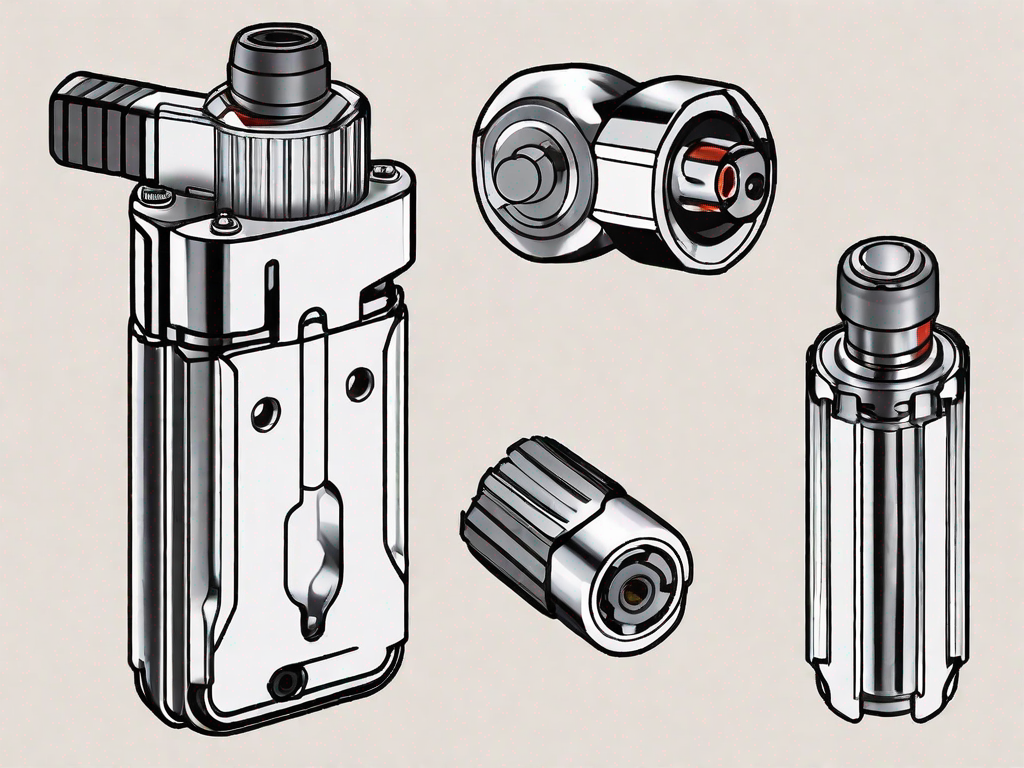
Tools Needed for Fixing a Lighter
To successfully fix a lighter with a low flame, you’ll need to gather a few essential tools. These tools will assist you in performing the necessary repairs and adjustments:
Basic Tools for Lighter Repair
Here are some basic tools that you should have:
- Small screwdriver set
- Tweezers
- Q-tips
- Butane fuel
When it comes to fixing lighters, having the right tools is crucial. A small screwdriver set will allow you to disassemble the lighter and access its internal components. This is particularly useful if you need to clean or replace any parts. Tweezers come in handy for delicate tasks, such as adjusting the flint or removing any debris that may be blocking the burner. Q-tips are perfect for cleaning hard-to-reach areas, ensuring that your lighter functions optimally. Lastly, butane fuel is essential for refilling the lighter and ensuring a steady and reliable flame.
Specialized Tools for Different Lighter Models
Depending on the specific lighter model you have, you may also require some specialized tools:
- Flint wheel adjustment tool
- Burner hole cleaning needle
Some lighters, especially those with flint wheels, may require a flint wheel adjustment tool. This tool allows you to fine-tune the position of the flint, ensuring proper ignition and a consistent flame. On the other hand, if your lighter has a burner with a small hole that is clogged, a burner hole cleaning needle can be used to clear any blockages. This will help restore the lighter’s functionality and improve its performance.
It’s important to note that not all lighters will require specialized tools. However, having them on hand can be beneficial if you encounter any specific issues with your lighter model. It’s always a good idea to consult the manufacturer’s instructions or seek professional advice if you’re unsure about using specialized tools.
Step-by-Step Guide to Fixing a Low Flame Lighter
Preparing Your Lighter for Repair
Before delving into the actual repair process, it’s important to properly prepare your lighter:
First, make sure you are working in a well-ventilated area. Safety should always be a priority when handling any flammable substances.
Now, let’s go through the steps to prepare your lighter:
- Ensure your lighter is completely empty of fuel by purging any remaining gas. This can be done by pressing the refill valve with a small screwdriver until no more gas is released.
- If applicable, remove the flint wheel cover using a small screwdriver or the designated tool for your lighter model. This will give you access to the flint chamber.
- Remove the flint from the flint chamber using tweezers and replace it if worn out. A worn-out flint can cause a weak spark, resulting in a low flame.
Adjusting the Flame Height
If your lighter has an adjustable flame height feature, follow these steps to enhance the flame:
Having a proper flame height is crucial for a well-functioning lighter. Here’s how you can adjust it:
- Ignite the lighter and observe the flame height. Take note of how low or high it is.
- If the flame is too low, adjust the flame height control wheel. Increase the flame height gradually, testing after each adjustment until you reach the desired flame height. This can be done by turning the control wheel clockwise.
- If the flame becomes too high, turn the flame height control wheel in the opposite direction to reduce the flame until it reaches the desired height. This can be done by turning the control wheel counterclockwise.
Cleaning the Lighter
Over time, lighter mechanisms can accumulate debris and residue, hindering the butane flow. Cleaning your lighter can often resolve low flame issues. Here’s how:
Proper maintenance and cleaning can significantly improve the performance of your lighter. Follow these steps:
- Dismantle the lighter by removing the casing using a small screwdriver. Be careful not to damage any internal components.
- Gently clean the burner holes and surrounding areas using a burner hole cleaning needle or a Q-tip dipped in rubbing alcohol. This will help remove any built-up residue or debris that may be blocking the butane flow.
- Allow all cleaned components to dry completely before reassembling the lighter. Moisture can affect the performance of the lighter, so ensure everything is dry before putting it back together.
Replacing the Fuel
If your lighter is still plagued by a low flame after attempting the previous steps, it may be time to replace the fuel:
Old or low-quality fuel can also contribute to a weak flame. Follow these steps to replace the fuel:
- Eject any remaining fuel from the lighter’s gas chamber by pressing the refill valve with a small screwdriver. This will ensure that there is no residual fuel left.
- Fill the lighter with butane fuel, ensuring that it’s compatible with your lighter model. Refer to the manufacturer’s instructions or consult a professional if you are unsure about the type of fuel to use.
- Allow the lighter to sit for a few minutes to let the gas stabilize before attempting to ignite it. This will ensure that the fuel is properly distributed throughout the lighter’s mechanism.
Remember, if you are not confident in your ability to repair the lighter yourself, it’s always best to seek professional assistance. Safety should always be the top priority when dealing with flammable materials.
Troubleshooting Persistent Low Flame Issues
When to Seek Professional Help
If you’ve followed all the steps outlined above and are still experiencing a low flame in your lighter, it may be necessary to seek professional assistance. A qualified technician will have the expertise and specialized equipment to diagnose and repair complex issues that may be affecting your lighter’s performance.
Maintenance Tips to Prevent Low Flame Issues
To avoid encountering low flame problems in the future, undertake regular preventive maintenance. Here are some tips:
- Regularly clean the burner holes and surrounding areas to prevent debris buildup.
- Keep the lighter properly fueled, refilling it whenever necessary.
- Replace the flint periodically to ensure consistent ignition.
Conclusion: Ensuring a Properly Functioning Lighter
Fixing a lighter with a low flame doesn’t have to be a daunting task. By understanding the common causes behind low flame issues and equipping yourself with the necessary knowledge and tools, you can easily troubleshoot and repair a lighter that is not functioning optimally. Remember to prioritize safety, follow the step-by-step guide, and seek professional help if needed. By taking proper care of your lighter, you can ensure a reliable flame whenever you need it.