A leaky toilet shut-off valve can be a frustrating and potentially costly problem. If left unrepaired, it can lead to water damage and even higher water bills. In this article, we will guide you through the process of fixing a leaky toilet shut-off valve. By understanding the function of the shut-off valve, identifying common problems, and following the necessary steps, you can resolve this issue and prevent further damage to your toilet and surrounding areas.
Understanding the Function of a Toilet Shut-Off Valve
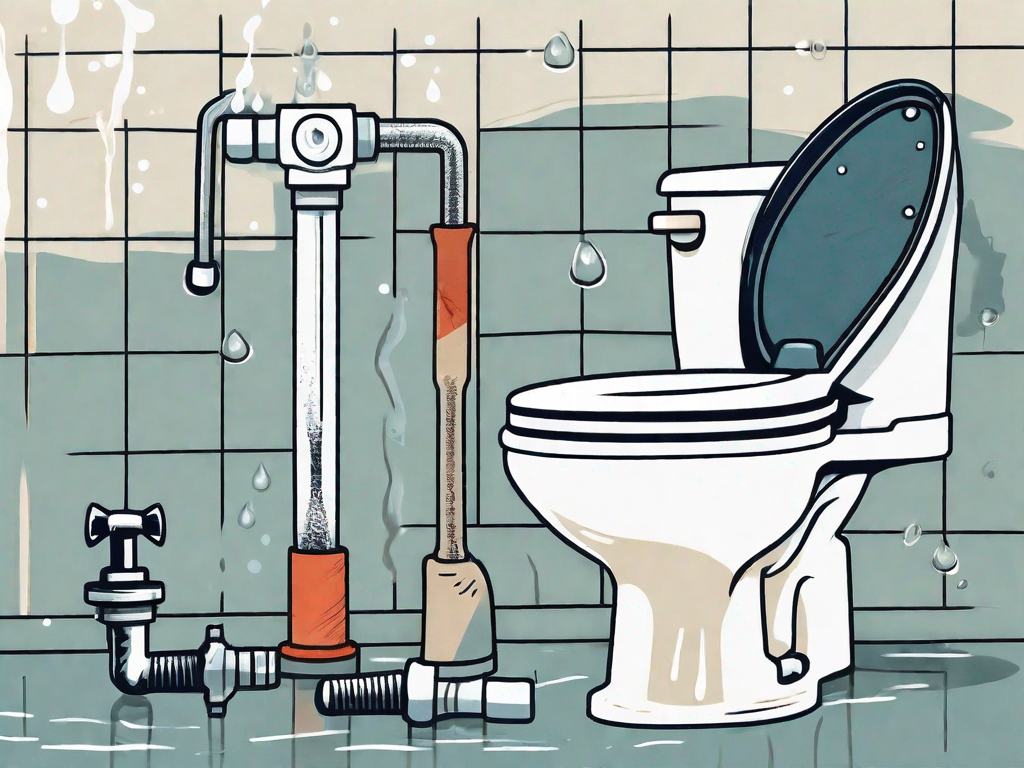
The shut-off valve plays a crucial role in controlling the water supply to your toilet. It is typically located near the floor or wall behind the toilet. This valve allows you to turn off the water flow to the toilet in case of emergencies or repairs. Understanding how this valve works will help you diagnose and fix any problems that may arise.
When it comes to the shut-off valve, it’s important to know how it functions and what role it plays in your toilet’s plumbing system. The shut-off valve acts as the primary control for regulating the water flow to your toilet. By turning the valve clockwise, you can shut off the water supply completely. This is crucial when you need to perform maintenance or repairs on your toilet. It is important to note that shutting off the valve will stop the flow of water to the toilet, but it will not affect the water supply to other fixtures in your home.
Now, let’s dive deeper into the role of the shut-off valve in your toilet. When you turn the valve clockwise to shut off the water supply, you are essentially closing a gate that blocks the flow of water. This gate is connected to a stem that extends through the valve body. When the valve is open, the stem allows water to flow freely. However, when you turn the valve clockwise, the gate closes, preventing water from passing through.
The Role of the Shut-Off Valve in Your Toilet
The shut-off valve is a crucial component of your toilet’s plumbing system. It not only allows you to control the water supply, but it also acts as a safety measure in case of emergencies. For example, if your toilet starts overflowing, you can quickly shut off the water supply using the shut-off valve to prevent further damage to your bathroom and home.
Additionally, the shut-off valve is essential when it comes to performing repairs or maintenance on your toilet. Whether you need to replace a faulty flapper or fix a leaky tank, shutting off the water supply using the shut-off valve ensures that you can work on your toilet without the risk of water flooding the bathroom.
Identifying Common Problems with Shut-Off Valves
Leaky shut-off valves can present several issues. Some common problems you may encounter include leaking around the valve stem or handle, difficulty in turning the valve, or a complete failure to stop water flow. These problems can be caused by worn-out seals, mineral buildup, or damage to the valve components over time.
If you notice any of these issues with your shut-off valve, it’s important to address them promptly. Ignoring a leaky shut-off valve can lead to water damage and increased water bills. In some cases, the valve may need to be replaced entirely if the damage is severe.
To prevent problems with your shut-off valve, regular maintenance is key. Inspecting the valve for any signs of wear or damage, cleaning it periodically to remove mineral buildup, and ensuring that it operates smoothly are all important steps to keep your shut-off valve in good working condition.
In conclusion, the shut-off valve in your toilet is a vital component that allows you to control the water supply and prevent water damage. Understanding its function and identifying common problems will help you maintain and repair your toilet effectively.
Tools Needed for the Repair
Before you begin repairing the leaky shut-off valve, you will need to gather the necessary tools and equipment. Having these tools on hand will make the process smoother and more efficient.
When it comes to plumbing repairs, having the right tools is essential. Not only will it save you time and effort, but it will also ensure that the job is done correctly. Here are some additional tools that you might find useful:
Essential Tools for Plumbing Repairs
Here are some essential tools you should have:
- Adjustable wrench: This versatile tool will allow you to tighten or loosen various plumbing fittings with ease. Make sure to choose an adjustable wrench that fits the size of the shut-off valve.
- Plumber’s tape: Also known as Teflon tape, plumber’s tape is used to create a watertight seal on threaded pipe fittings. It is an inexpensive yet effective tool that can prevent leaks.
- Bucket or towels to catch any water: Plumbing repairs can get messy, especially when dealing with leaks. Having a bucket or towels nearby will help you contain any water that may spill during the repair process.
- Pipe cutter: If the shut-off valve needs to be replaced, a pipe cutter will come in handy. This tool allows you to cut through copper or plastic pipes cleanly and accurately.
- Plunger: While not directly related to repairing a shut-off valve, a plunger is a useful tool to have in case you encounter any clogged drains or toilets along the way.
Safety Equipment for DIY Plumbing
Remember to prioritize your safety and use the following equipment:
- Safety goggles: When working with plumbing, there is always a risk of debris or water splashing into your eyes. Protect your vision by wearing safety goggles throughout the repair process.
- Gloves: Plumbing repairs often involve handling sharp or dirty materials. Wearing gloves will not only protect your hands from potential injuries but also keep them clean.
- Dust mask: If you are working in a dusty or moldy area, wearing a dust mask can prevent you from inhaling harmful particles.
By ensuring that you have all the necessary tools and safety equipment, you can approach the repair with confidence and peace of mind. Remember to take your time, follow proper procedures, and consult professional help if needed.
Steps to Diagnose a Leaky Shut-Off Valve
Before you start repairing the shut-off valve, it is essential to diagnose the source of the leak accurately. Follow these steps to identify the problem.
Checking for Visible Leaks
Inspect the shut-off valve closely for any visible leaks. Look for water drips or moisture around the valve stem or handle. Sometimes, leaks may be small and difficult to spot immediately, so examine the valve carefully.
When checking for leaks, it is important to note that shut-off valves can develop leaks due to various reasons. It could be due to a worn-out valve stem, a damaged O-ring, or even a loose connection. By carefully examining the valve, you can determine the specific cause of the leak.
Additionally, it is worth mentioning that shut-off valves are typically located near toilets, sinks, or other water fixtures. Therefore, it is crucial to check the surrounding area for any signs of water damage, such as discolored walls or floors. These signs can indicate a leak that may be originating from the shut-off valve.
Testing the Valve Function
To test the valve’s function, turn the handle clockwise to shut off the water supply to the toilet. If the valve does not completely stop the flow of water, or if it is difficult to turn, there may be an issue with the valve itself. This will need to be addressed during the repair process.
When testing the shut-off valve, it is important to be cautious and gentle. Applying excessive force to a malfunctioning valve can cause further damage and make the repair process more complicated. If you encounter any resistance or difficulty while turning the valve, it is advisable to seek professional assistance to avoid any potential mishaps.
Furthermore, it is worth noting that shut-off valves can become stiff or stuck over time due to mineral deposits or corrosion. Regular maintenance, such as lubricating the valve, can help prevent such issues and ensure smooth operation.
Repairing the Leaky Shut-Off Valve
Once you have diagnosed the issue with your shut-off valve, you can proceed with the repair process. Follow these steps to fix a leaky shut-off valve:
Shutting Off the Water Supply
Before you begin repairing the shut-off valve, turn off the water supply to your home completely. This will prevent any accidental leaks or water flow while you work.
It is important to locate the main water shut-off valve for your home. This valve is typically located near the water meter or where the main water line enters your house. It may be in the basement, crawl space, or utility room. Once you have located the shut-off valve, turn it clockwise until it is fully closed. This will stop the flow of water to your entire house.
Removing the Old Valve
Using an adjustable wrench, loosen and remove the nut that secures the shut-off valve to the water supply line. Once the nut is removed, carefully pull the valve away from the supply line, taking care not to damage any other plumbing components.
Inspect the old shut-off valve for any signs of damage or wear. Over time, valves can become corroded or develop leaks due to age or improper installation. It is important to replace the valve if it is damaged to ensure a proper fix and prevent future leaks.
Installing the New Valve
Before installing the new shut-off valve, wrap plumber’s tape clockwise around the threads of the supply line. This will help create a watertight seal. Plumber’s tape, also known as Teflon tape, is a thin white tape that is used to seal threaded pipe connections.
Ensure that the threads on the supply line are clean and free from debris before applying the plumber’s tape. Start at the end of the threads and wrap the tape tightly around the threads in a clockwise direction. Be sure to overlap the tape slightly as you go. This will help create a tight seal when the new valve is installed.
Next, attach the new valve to the supply line by tightening the nut with an adjustable wrench. Ensure that the valve is secure and in the closed position before turning on the water supply.
Once the new shut-off valve is installed, it is important to check for any leaks. Slowly turn on the water supply and inspect the valve and surrounding area for any signs of water leakage. If you notice any leaks, tighten the nut further or consider replacing the valve again to ensure a proper seal.
Remember to test the shut-off valve by turning it on and off a few times to ensure smooth operation. This will help you verify that the valve is functioning correctly and effectively stopping the water flow when needed.
By following these steps, you can successfully repair a leaky shut-off valve and restore proper water flow control in your home. Regular maintenance and inspections of your plumbing system can help prevent future leaks and ensure the longevity of your shut-off valves.
Tips for Maintaining Your Toilet Shut-Off Valve
Now that you have repaired your leaky shut-off valve, it is important to maintain its functionality for the long term. Regular inspection and maintenance can help prevent future leaks and ensure proper valve operation.
Regular Inspection and Maintenance
Periodically check the shut-off valve for any signs of leaks or damage. If you notice any issues, address them promptly to prevent further damage and minimize the need for future repairs.
When to Call a Professional Plumber
If you are uncomfortable or unsure about repairing the shut-off valve yourself, it is best to call a professional plumber. They have the knowledge and experience to handle any plumbing issue effectively and safely.
By following these steps and tips, you can successfully fix a leaky toilet shut-off valve. Remember to prioritize safety and take your time during the repair process. Regular inspection and maintenance will help prevent future problems and keep your toilet functioning optimally.