The Honda Civic AC system is an essential component of your vehicle that helps keep you comfortable during hot summer days. However, like any mechanical system, it may encounter issues over time. If you’re experiencing problems with your Honda Civic AC, don’t fret!
This comprehensive guide will walk you through the process of fixing it step-by-step. By the end of this article, you’ll have the knowledge and confidence to tackle any AC problem that comes your way.
Understanding the Basics of Your Honda Civic AC System
Before diving into the troubleshooting process, it’s crucial to have a good understanding of how your Honda Civic AC system works. This knowledge will help you identify the root cause of any issues and make the necessary repairs more efficiently.
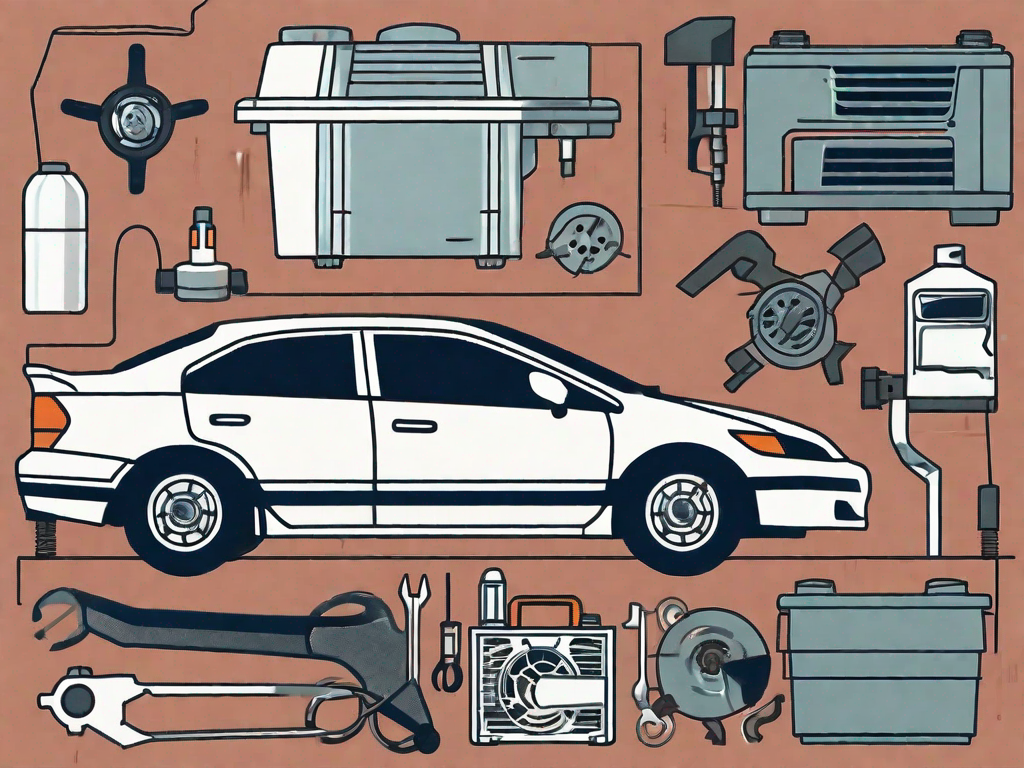
The Honda Civic AC system consists of several key components. These include the compressor, condenser, evaporator, expansion valve, and various hoses and connections. Each part plays a vital role in ensuring that your AC system functions properly.
Let’s take a closer look at each component:
The Compressor
The compressor is the heart of the AC system. It is responsible for pressurizing the refrigerant, turning it into a hot gas. This process is essential for removing heat from the air and providing cool air inside your vehicle.
The Condenser
The condenser is located in front of the radiator and is responsible for cooling down the hot gas refrigerant that comes from the compressor. As the hot gas passes through the condenser, it dissipates heat and transforms into a liquid.
The Evaporator
The evaporator is located inside the vehicle’s cabin and is responsible for absorbing heat from the surrounding air. As the liquid refrigerant enters the evaporator, it evaporates and absorbs heat, cooling down the air in the process.
The Expansion Valve
The expansion valve is located between the evaporator and the condenser. Its main function is to regulate the flow of refrigerant into the evaporator. By controlling the amount of refrigerant entering the evaporator, the expansion valve ensures that the cooling process is efficient and effective.
Now that we have a better understanding of the components, let’s take a closer look at how the AC system works:
The Refrigerant
The AC system relies on a refrigerant, commonly known as Freon, to remove heat from the air and provide cool air inside the vehicle. The refrigerant undergoes a continuous cycle of compression and expansion, allowing it to absorb and release heat.
Here’s a step-by-step breakdown of the AC system’s operation:
- The compressor pressurizes the refrigerant, turning it into a hot gas.
- The hot gas refrigerant flows through the condenser, where it cools down and transforms into a liquid.
- The liquid refrigerant then travels to the evaporator.
- As the liquid refrigerant enters the evaporator, it absorbs heat from the surrounding air, cooling it in the process.
- The cool air is then blown into the cabin via the vents, providing a comfortable temperature for the occupants.
Understanding how each component works together in the AC system is essential for troubleshooting and diagnosing any issues that may arise. By having a solid grasp of the basics, you’ll be better equipped to maintain and repair your Honda Civic AC system.
Identifying Common Honda Civic AC Problems
Now that you have a basic understanding of how the AC system works, let’s take a look at some common issues that Honda Civic owners may face.
Inconsistent Cooling
If you notice that your Honda Civic AC is not consistently cooling the cabin or that the cool air fluctuates in temperature, it may indicate a problem with the compressor, refrigerant levels, or a faulty thermostat. A thorough diagnostic is necessary to pinpoint the exact cause.
Inconsistent cooling can be frustrating, especially on hot summer days when you rely on your AC to keep you comfortable. The compressor plays a crucial role in the cooling process, as it compresses the refrigerant and circulates it through the system. If the compressor is not functioning properly, it may not be able to maintain a consistent flow of cool air.
Another possible cause of inconsistent cooling is low refrigerant levels. Refrigerant is responsible for absorbing heat from the cabin and releasing it outside. If there is a leak in the system or if the refrigerant levels are low, the AC may struggle to cool the air effectively.
Lastly, a faulty thermostat can also contribute to inconsistent cooling. The thermostat regulates the temperature inside the cabin by controlling the compressor’s operation. If the thermostat is malfunctioning, it may not accurately detect the temperature and adjust the cooling accordingly.
Strange Noises from the AC
Unusual noises coming from your Honda Civic AC, such as grinding, squealing, or knocking sounds, can indicate problems with the compressor, blower motor, or other components. These noises should not be ignored, as they may lead to further damage if left unaddressed.
One possible cause of strange noises is a failing compressor. If you hear grinding or knocking sounds, it could mean that the compressor’s internal components are worn out or damaged. Ignoring these noises can lead to further damage and potentially expensive repairs.
The blower motor is another component that can cause unusual noises. If you hear a squealing sound, it may indicate that the blower motor’s bearings are worn out and need to be replaced. The blower motor is responsible for pushing the cool air into the cabin, so any issues with it can affect the overall performance of the AC system.
It’s important to address these strange noises as soon as possible to prevent further damage and ensure the longevity of your Honda Civic’s AC system.
AC Not Blowing Cold Air
If your Honda Civic AC is blowing air that isn’t cold or is not blowing any air at all, there might be an issue with the compressor, refrigerant leak, or a clogged or malfunctioning component. Identifying the root cause will help you take the appropriate steps to fix the problem.
A common cause of the AC not blowing cold air is a malfunctioning compressor. If the compressor is not engaging or is not functioning properly, it won’t be able to circulate the refrigerant and cool the air. This can be caused by electrical issues, a faulty clutch, or internal damage to the compressor.
Another possible cause is a refrigerant leak. The refrigerant is responsible for absorbing heat from the cabin and releasing it outside. If there is a leak in the system, the refrigerant levels may be insufficient to cool the air effectively. Identifying and repairing the leak is crucial to restore the AC’s performance.
Clogged or malfunctioning components, such as the expansion valve or the evaporator coil, can also prevent the AC from blowing cold air. These components play a vital role in the cooling process, and any issues with them can disrupt the flow of refrigerant and hinder the cooling performance.
When experiencing AC problems, it’s important to consult a qualified technician who can diagnose the issue accurately and recommend the appropriate repairs. Ignoring the problem or attempting DIY fixes without proper knowledge can lead to further damage and potentially costlier repairs in the long run.
Gathering Necessary Tools and Safety Equipment
Before you begin any AC repairs, it’s essential to ensure you have the right tools and safety equipment. This will not only make the job easier but also protect you from potential accidents or injuries.
When it comes to AC repairs, having the right tools is crucial. It allows you to diagnose issues accurately and make the necessary repairs efficiently. One of the essential tools you’ll need is a refrigerant pressure gauge. This gauge helps you measure the pressure of the refrigerant in your Honda Civic’s AC system, allowing you to determine if it’s at the correct level. Additionally, a manifold gauge set is necessary for checking the high and low pressure sides of the AC system. This set allows you to monitor the pressure and temperature of the refrigerant, helping you identify any abnormalities.
Aside from gauges, you’ll also need a variety of wrenches, screwdrivers, and pliers. These tools come in handy when you need to remove or tighten various components during the repair process. Whether it’s loosening a bolt or tightening a connection, having the right wrench or screwdriver can make all the difference.
Furthermore, a multimeter is an essential tool for AC repairs. This device measures electrical voltage, current, and resistance, allowing you to troubleshoot electrical issues effectively. With a multimeter, you can test electrical connections, check for continuity, and ensure that all electrical components are functioning correctly.
Safety Precautions and Equipment
AC repairs can involve handling refrigerants and electrical components, which can be potentially hazardous. Therefore, prioritizing safety is of utmost importance. When working on your Honda Civic’s AC system, it’s crucial to wear the appropriate safety gear.
First and foremost, wearing gloves is essential. Gloves not only protect your hands from sharp edges or hot components but also prevent direct contact with refrigerants. Refrigerants can cause skin irritation or frostbite, so wearing gloves is a necessary precaution.
Additionally, safety glasses are a must-have when working on AC repairs. They shield your eyes from any debris or chemicals that may be released during the repair process. Whether it’s refrigerant leaks or accidental splashes, safety glasses provide vital protection for your eyes.
Working in a well-ventilated area is another safety precaution to consider. AC repairs often involve handling refrigerants, which can release harmful fumes. Ensuring proper ventilation helps minimize the risk of inhaling these fumes and keeps the air quality safe for you to work in.
Furthermore, before starting any electrical work, it’s crucial to disconnect the vehicle’s battery. This step prevents any accidental electrical shocks or short circuits that may occur while working on the AC system. Disconnecting the battery ensures your safety and the integrity of the electrical components you’ll be handling.
Remember, when it comes to AC repairs, safety should always be your top priority. By having the right tools and safety equipment and following proper precautions, you can ensure a smooth and secure repair process.
Step-by-Step Guide to Fixing Your Honda Civic AC
Now that you have the necessary tools and an understanding of the AC system, it’s time to dive into the step-by-step process of fixing your Honda Civic AC.
Diagnosing the Problem
The first step in any AC repair is accurately diagnosing the problem. Start by checking the refrigerant levels using a pressure gauge. Ensure that the compressor engages when the AC is turned on and inspect for any visible leaks or damaged components. Consult your vehicle’s manual or seek professional advice if you need guidance in diagnosing the issue.
Replacing or Repairing AC Components
Once you’ve identified the source of the problem, you may need to replace or repair specific AC components. This could involve replacing a faulty compressor, condenser, or evaporator, or repairing any leaks or damaged connections. Follow the manufacturer’s instructions and refer to your vehicle’s manual for detailed guidance on component replacement.
Recharging the AC System
After repairing or replacing any faulty components, it’s crucial to recharge the AC system with the correct amount of refrigerant. This ensures optimal performance. Connect a manifold gauge set to the AC system and follow the proper procedure to recharge the system to the recommended levels. Take care not to overcharge, as this can lead to further issues.
Maintenance Tips for Your Honda Civic AC
Prevention is always better than cure, and the same principle applies to your Honda Civic AC system. Regular maintenance can help prevent major issues and keep your AC running smoothly. Here are a few essential maintenance tips to follow:
Regular AC Check-ups
Periodically inspect your AC system for any visible leaks, damaged components, or unusual noises. If you notice anything out of the ordinary, address it promptly before it develops into a more significant problem.
Cleaning and Replacing AC Filters
Clean or replace your AC filters regularly to ensure proper airflow and prevent dust and debris from clogging the system. Dirty filters can restrict airflow, strain the AC components, and result in reduced cooling performance.
Avoiding Common AC Issues
Lastly, avoid common AC issues by minimizing direct sunlight exposure to your vehicle, parking in shaded areas, and avoiding harsh driving conditions whenever possible. Taking these simple precautions can help prolong the lifespan of your AC system.
By following these step-by-step instructions and practicing proper AC maintenance, you can ensure that your Honda Civic AC system will keep you cool and comfortable on every journey. Remember, if you ever feel unsure about any repairs, consult a professional mechanic to ensure the job is done safely and effectively. Happy fixing!