If you have noticed a hole in the bottom of your fire pit, it is important to address the issue as soon as possible. Ignoring the hole can lead to further damage and make your fire pit unsafe to use. In this article, we will guide you through the process of fixing a hole in the bottom of a fire pit, ensuring that you can continue to enjoy cozy evenings around the fire in no time.
Understanding the Problem: The Hole in Your Fire Pit
Before you can begin fixing the hole in your fire pit, it is essential to understand the extent of the damage. Start by identifying the size and exact location of the hole. This will give you a better idea of what repair method to use and how much material you will need.
When it comes to fire pits, they are not just functional outdoor features but also serve as gathering spots for friends and family. Whether you use your fire pit for roasting marshmallows, keeping warm on chilly nights, or simply enjoying the mesmerizing flames, a hole in your fire pit can be a real inconvenience. However, with the right knowledge and tools, you can restore your fire pit to its former glory.
Identifying the Size and Location of the Hole
Begin by thoroughly examining your fire pit for any possible holes. Carefully inspect the bottom and sides to ensure that you do not miss any hidden damages. Over time, fire pits can develop holes due to various factors such as extreme heat, corrosion, or accidental damage. By carefully examining your fire pit, you can determine the cause of the hole and take appropriate measures to prevent future damage.
Once you have located the hole, measure its size using a tape measure or ruler. This measurement will help you determine the amount of repair material needed. Remember to measure both the diameter and depth of the hole to ensure accurate calculations. By knowing the exact size of the hole, you can avoid wasting time and money on unnecessary repairs.
Assessing the Damage: Is it Fixable?
After identifying the size and location of the hole, you need to assess the overall damage. Consider the materials your fire pit is made of and evaluate whether it can be repaired or if replacement is the better option. Fire pits are typically made from various materials such as metal, stone, or brick, each with its own strengths and weaknesses.
If your fire pit is made of metal, such as stainless steel or cast iron, smaller holes can often be effectively fixed using specialized high-temperature adhesives or welding techniques. However, larger and more extensive damages may require professional assistance or even a complete replacement. On the other hand, if your fire pit is made of stone or brick, repairing the hole may involve carefully removing and replacing damaged pieces to ensure structural integrity.
It is important to note that safety should always be a top priority when dealing with fire pits. If you are unsure about the extent of the damage or the repair process, it is recommended to consult a professional who can provide expert guidance and ensure that your fire pit is safe to use.
Gathering the Necessary Tools and Materials
Now that you have a clear understanding of the problem and have decided to repair the fire pit, it is time to gather the necessary tools and materials. Proper preparation will streamline the repair process and ensure that you have everything you need readily available.
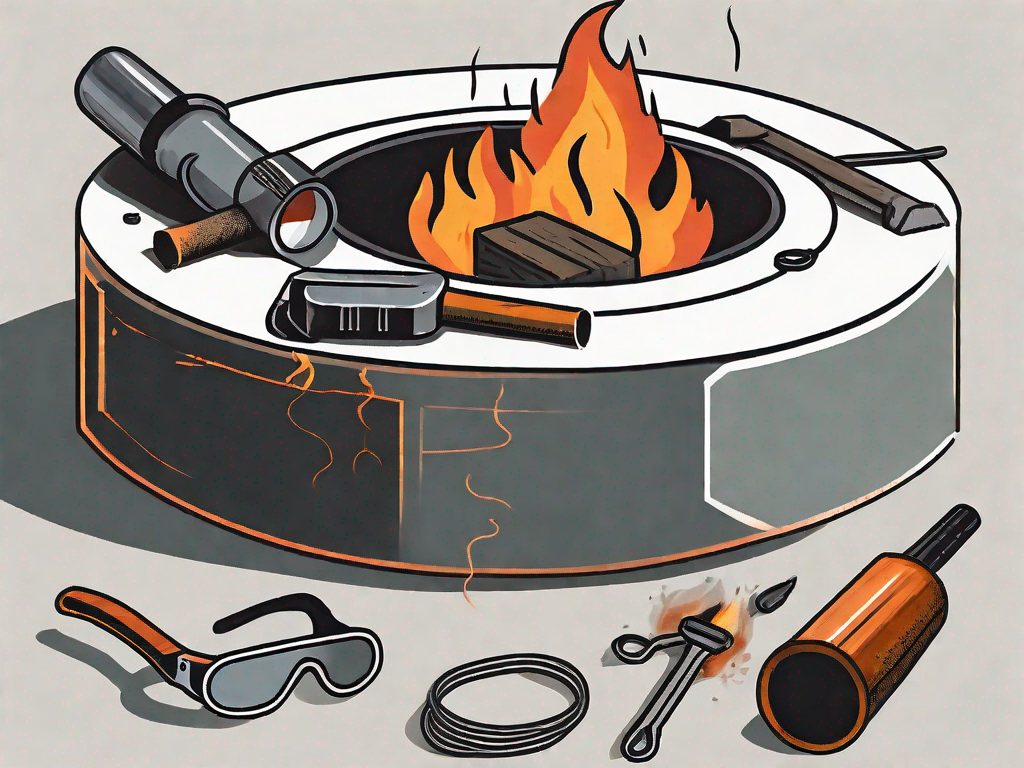
Before diving into the repair, it’s important to ensure your safety. Protecting your eyes should be a priority, so make sure to wear safety goggles. Additionally, work gloves will not only keep your hands clean but also provide some protection against any sharp edges or debris you may encounter during the repair process.
Now let’s talk about the tools you’ll need to get the job done. A tape measure or ruler will come in handy when assessing the size of the hole in your fire pit. This will help you determine the amount of material needed for the repair.
Depending on the severity of the damage, you may need either a chisel or a drill. A chisel can be used to remove any loose or damaged material around the hole, while a drill can be used to create small holes for better adhesion of the repair material.
When it comes to applying the repair material, having a trowel or putty knife is essential. These tools will allow you to spread the material evenly and ensure a smooth finish. Additionally, a wire brush will be useful for cleaning the surface of the fire pit before applying the repair material, removing any loose debris or rust that could affect the adhesion.
Choosing the Right Materials for Your Fire Pit
The materials you select for repairing the hole in your fire pit may vary depending on the type of pit and the extent of the damage. It’s always a good idea to consult with your local home improvement store or the fire pit manufacturer to ensure that you choose the most suitable materials for your specific situation.
One common option for fire pit repair is fire pit cement. This type of cement is specifically designed to withstand high temperatures and provide long-lasting durability. It is often used for repairing cracks or small holes in fire pits.
Another option is refractory cement, which is a heat-resistant material commonly used in fireplaces and fire pits. It can withstand extremely high temperatures and is ideal for repairing larger holes or areas of significant damage.
If you prefer a more convenient solution, fire pit patch kits are available in the market. These kits usually include a pre-mixed repair material that can be easily applied to the damaged area. They often come with detailed instructions, making the repair process more straightforward.
Remember, choosing the right materials is crucial for a successful fire pit repair. Taking the time to research and consult with experts will ensure that you make the best decision for your specific fire pit and the repairs needed.
Safety Precautions Before You Begin
Prior to starting the repair process, it is crucial to prioritize safety. Fire pit repair can involve hazardous materials and potentially dangerous work conditions, so taking proper precautions is paramount.
Repairing a fire pit requires careful attention to safety measures to ensure a successful and incident-free repair. By following these safety precautions, you can protect yourself and others from potential harm.
Protective Gear for Fire Pit Repair
Ensure your safety by wearing the appropriate protective gear, including safety goggles and work gloves. These will shield your eyes and hands from any debris or chemicals that may be involved during the repair process.
Safety goggles are essential for protecting your eyes from flying debris, sparks, or any hazardous materials that may be present during the repair. They provide a barrier between your eyes and potential harm, reducing the risk of eye injuries.
Work gloves are equally important as they provide protection for your hands. They shield your skin from sharp edges, hot surfaces, and any chemicals that may be used during the repair. Wearing sturdy work gloves will minimize the risk of cuts, burns, or chemical exposure.
Ensuring a Safe Working Environment
Before you begin repairing the hole in your fire pit, make sure the area is clear of any flammable materials that may pose a fire hazard. Create a safe working environment by removing any nearby objects that could potentially catch fire and ensuring proper ventilation.
Inspect the surrounding area and remove any combustible materials such as dry leaves, paper, or flammable liquids. These materials can easily ignite and cause a fire, endangering yourself and your property.
Additionally, ensure proper ventilation in the area where you will be working. Adequate airflow will help dissipate any fumes or gases that may be released during the repair process, reducing the risk of inhalation and potential health hazards.
By taking the time to prepare the working environment and removing any potential fire hazards, you can minimize the risk of accidents and ensure a safe repair process.
Step-by-Step Guide to Fixing a Hole in a Fire Pit
Preparing the Fire Pit for Repair
Before applying the repair material, it is important to prepare the fire pit properly. Follow these steps:
- Begin by thoroughly cleaning the area around the hole. Use a wire brush to remove any loose debris, rust, or dirt that may affect the bonding of the repair material.
- If the hole is small, you may need to enlarge it slightly using a chisel or drill. This will help create a better surface for the repair material to adhere to.
- Once the hole is cleaned and enlarged (if necessary), wipe the area with a damp cloth to remove any remaining dust or debris.
Applying the Repair Material
Now that your fire pit is prepared, you can begin applying the repair material. Follow these steps:
- Refer to the instructions provided with the repair material for specific mixing ratios and application techniques.
- Using a trowel or putty knife, apply the repair material carefully to cover the entire hole. Make sure to spread it evenly and smooth out any excess material.
- Allow the repair material to dry and cure completely according to the manufacturer’s instructions. This may take several hours, so be patient and avoid using the fire pit until the material is fully hardened.
Finishing and Polishing the Repaired Area
Once the repair material has dried and cured, you can finish and polish the repaired area to ensure a seamless appearance. Follow these steps:
- Use a damp cloth or sponge to gently clean any residue or excess material around the repaired area.
- If desired, apply a high-temperature paint or coating to match the rest of the fire pit and provide additional protection to the repaired section.
- Allow the paint or coating to dry completely before using the fire pit.
Maintenance Tips to Prevent Future Holes
Now that your fire pit is repaired and ready for use, it is essential to take proper care to prevent future holes or damages. Regular maintenance and responsible usage will ensure the longevity of your fire pit.
Regular Cleaning and Inspection
Make it a habit to clean your fire pit regularly, removing any debris or ash buildup that can cause excessive wear and tear. Additionally, inspect your fire pit for any signs of damage, such as cracks or dents, and address them promptly before they worsen.
Proper Use of Your Fire Pit
To prevent unnecessary damage, ensure you are using your fire pit correctly. Avoid placing excessive weight on the fire pit, refrain from using it as a cooking surface, and never burn materials that can create intense heat and cause burn-throughs.
By following these maintenance tips, you can enjoy your fire pit for years to come without worrying about further holes or damages.
In conclusion, fixing a hole in the bottom of a fire pit is a manageable task that can be done with proper preparation and the right tools and materials. By understanding the problem, taking necessary safety precautions, and following a step-by-step guide, you can successfully repair your fire pit and prevent further damage. With regular maintenance, you can ensure that your fire pit continues to provide warmth and ambiance for countless memorable evenings.