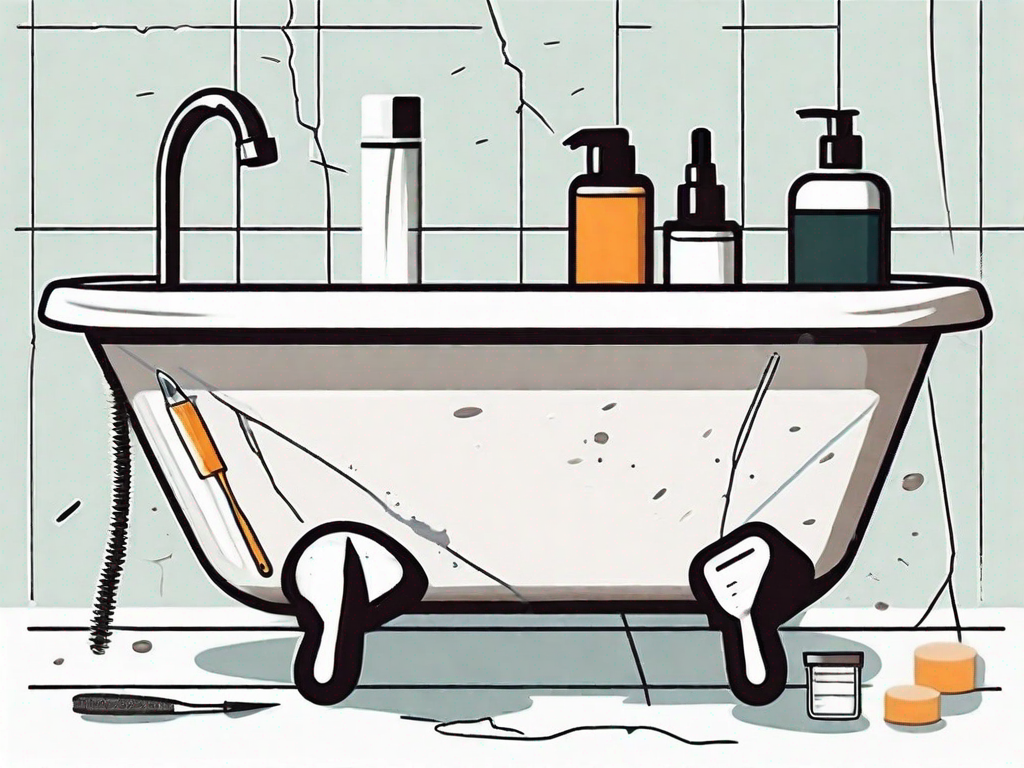
Acrylic bathtubs are a popular choice for homeowners due to their durability and aesthetic appeal. However, over time, these bathtubs can develop hairline cracks that not only diminish their visual appeal but also pose the risk of water leakage. Luckily, fixing a hairline crack in an acrylic bathtub is a relatively simple task that can be done without professional help. In this article, we will guide you through the process, step by step, to ensure a seamless repair.
Understanding the Nature of Acrylic Bathtubs
Before we delve into the repair process, it’s essential to understand the characteristics of acrylic bathtubs. Acrylic bathtubs are made from a combination of acrylic polymer and fiberglass reinforcement. This composite material gives these tubs their glossy appearance and lightweight nature.
Acrylic bathtubs are a popular choice for homeowners due to their many advantages. Not only are they visually appealing with their smooth and shiny surface, but they are also highly durable. The combination of acrylic polymer and fiberglass reinforcement makes these bathtubs strong and resistant to cracking under normal use. This means that you can enjoy long, relaxing baths without worrying about damaging the tub.
Another great feature of acrylic bathtubs is their ability to retain heat for extended periods. The solid acrylic layer, reinforced with fiberglass underneath, helps to trap the warmth of the water, allowing you to soak in a comfortably hot bath for as long as you desire. This is especially beneficial during the cold winter months when a warm bath can provide much-needed relaxation and comfort.
The Composition of Acrylic Bathtubs
Acrylic bathtubs consist of a solid acrylic layer that is reinforced with fiberglass underneath. This combination makes the bathtubs strong, resistant to cracking under normal use, and capable of retaining heat for extended periods.
The solid acrylic layer is responsible for the glossy appearance of the bathtub. It is a high-quality material that is known for its durability and resistance to stains and scratches. This means that your acrylic bathtub will maintain its beautiful shine for years to come, even with regular use.
The fiberglass reinforcement adds strength and stability to the bathtub. It helps to prevent the tub from flexing or bending under the weight of the water and the person using it. This ensures that the bathtub remains structurally sound and provides a safe and enjoyable bathing experience.
Why Acrylic Bathtubs Crack
Despite their durability, acrylic bathtubs can develop hairline cracks over time. These cracks are usually caused by stress from heavy impact or sudden temperature changes. Additionally, improper installation or inadequate support can also lead to cracks.
Heavy impact, such as dropping a heavy object onto the bathtub, can cause the acrylic material to crack. While acrylic is a strong material, it is not indestructible, and extreme force can result in damage. It is important to handle heavy objects with care when near the bathtub to prevent any accidental damage.
Sudden temperature changes can also cause acrylic bathtubs to crack. For example, pouring hot water directly onto a cold surface can create thermal stress, leading to cracks. It is advisable to gradually adjust the water temperature when filling the bathtub to prevent any potential damage.
Improper installation or inadequate support can weaken the structure of the bathtub, making it more susceptible to cracks. It is crucial to ensure that the bathtub is installed correctly, following the manufacturer’s guidelines, and that it is adequately supported to prevent any unnecessary stress on the material.
In conclusion, acrylic bathtubs are a popular choice for homeowners due to their durability, glossy appearance, and ability to retain heat. Understanding the composition of acrylic bathtubs and the reasons behind their cracking can help you properly care for and maintain your bathtub, ensuring its longevity and continued enjoyment.
Identifying Hairline Cracks in Your Bathtub
Before you start the repair process, it’s crucial to accurately identify the hairline cracks in your bathtub. Hairline cracks are often difficult to detect, but there are a few common signs to look out for.
One common location for hairline cracks is near the drain. Due to the constant flow of water and the weight of objects placed in the tub, the area around the drain can experience stress, leading to the formation of cracks. Another common location is near the edges of the bathtub. These areas are more susceptible to cracking because they bear the brunt of any impact or pressure exerted on the tub. Additionally, cracks may also be found around fixtures, such as the faucet or handles, as these areas can experience stress from regular use.
When inspecting your bathtub for hairline cracks, it’s important to examine the areas under adequate lighting. Natural light or a bright overhead light can help reveal any subtle cracks that may be present. Take your time and carefully inspect the surface, paying close attention to any irregularities or lines that may indicate a crack.
Differentiating Between Surface and Structural Cracks
Once you have identified a crack, it’s important to differentiate between surface cracks and structural cracks. Surface cracks are shallow and do not penetrate through the entire thickness of the tub. These cracks are often cosmetic in nature and can typically be repaired using a simple DIY method.
On the other hand, if you notice a crack that extends deep into the bathtub or has caused structural damage, professional assistance may be required. Structural cracks can compromise the integrity of the tub and may require more extensive repairs. These cracks can be caused by factors such as heavy impacts, improper installation, or the natural wear and tear of an aging bathtub.
When in doubt, it’s always best to consult with a professional before attempting any repairs on your own. They will be able to assess the severity of the crack and provide guidance on the most appropriate course of action.
Gathering the Necessary Repair Materials
Now that you have identified the hairline crack in your acrylic bathtub, it’s time to gather the necessary repair materials. Here’s what you’ll need:
Choosing the Right Acrylic Repair Kit
There are various acrylic repair kits available in the market. It’s essential to choose a kit that matches the color and finish of your bathtub. Read the instructions carefully, as some kits may require mixing different components.
When selecting an acrylic repair kit, consider the specific type of acrylic used in your bathtub. Different manufacturers may use different types of acrylic, and using the wrong repair kit can lead to ineffective results. Look for a kit that specifically mentions compatibility with your bathtub’s acrylic material.
Furthermore, pay attention to the color and finish of your bathtub. Acrylic bathtubs come in a variety of shades and textures, and it’s crucial to choose a repair kit that closely matches the existing color and finish. This will ensure that the repaired area blends seamlessly with the rest of the bathtub, creating a visually pleasing result.
Before making a purchase, it’s a good idea to research different brands and read customer reviews. This will give you an idea of the quality and effectiveness of the repair kits available in the market. Look for kits that have positive feedback and a track record of successful repairs.
Additional Tools for Repair
In addition to the repair kit, you’ll need a few basic tools such as sandpaper, a scraper or putty knife, a clean cloth, and protective gloves. These tools will help you prepare the surface and apply the repair materials effectively.
Start by using sandpaper to gently sand the area around the crack. This will create a smooth surface for the repair materials to adhere to. Be careful not to apply too much pressure, as this can damage the surrounding area.
After sanding, use a scraper or putty knife to remove any loose or flaking acrylic. This will ensure that the repair materials bond securely to the bathtub’s surface. Take your time and be thorough in this step to achieve the best results.
Once the surface is properly prepared, use a clean cloth to wipe away any dust or debris. This will ensure a clean and smooth application of the repair materials, preventing any imperfections or unevenness.
Lastly, don’t forget to wear protective gloves throughout the repair process. Some repair kits contain chemicals that can be harmful to the skin, so it’s important to take the necessary precautions to protect yourself.
By gathering the right repair materials and tools, you’ll be well-prepared to fix the hairline crack in your acrylic bathtub. Following the instructions provided with the repair kit and taking your time to complete each step carefully will help you achieve a successful repair that restores the beauty and functionality of your bathtub.
Preparing the Bathtub for Repair
Before you start repairing the hairline crack, it’s crucial to prepare the bathtub surface properly. This will ensure that the repair is long-lasting and seamless.
Repairing a crack in a bathtub is an essential maintenance task that can save you from costly replacements. By following the correct preparation steps, you can ensure that the repair is effective and durable.
Cleaning the Bathtub Surface
Start by cleaning the surface around the crack using a mild detergent and warm water. This step is important to remove any dirt, grime, or soap scum that may be present. Not only will this improve the appearance of the bathtub, but it will also create a clean surface for the repair materials to adhere to.
Take your time to scrub the surface gently with a soft sponge or cloth. Pay close attention to the area around the crack, ensuring that it is thoroughly cleaned. Rinse the surface thoroughly with clean water to remove any residue from the cleaning solution.
Once the surface is clean, dry it using a clean cloth. It’s crucial to remove all moisture from the surface before proceeding with the repair. Any remaining water can affect the adhesion of the repair filler, compromising the effectiveness of the repair.
Ensuring a Dry Surface for Repair
Before applying the repair materials, the surface must be completely dry. While air drying is an option, it may take a significant amount of time. To expedite the drying process, you can use a hairdryer on a low heat setting.
Hold the hairdryer a few inches away from the surface and move it back and forth to evenly distribute the warm air. Be cautious not to overheat the surface, as excessive heat can damage the bathtub material. Continuously check the surface for any signs of moisture, ensuring that it is completely dry before proceeding.
Alternatively, if you have ample time, you can allow the surface to air dry naturally. This method may take longer, but it ensures that the surface is thoroughly dried without the use of any additional tools.
By taking the time to properly clean and dry the bathtub surface, you are setting the foundation for a successful repair. These preparation steps are crucial in ensuring that the repair filler adheres properly and provides a seamless finish.
Step-by-Step Guide to Fixing the Crack
Now that you have prepared the bathtub surface, let’s proceed to the step-by-step process of fixing the hairline crack.
Applying the Filler
Begin by opening the acrylic repair kit and following the manufacturer’s instructions for mixing the repair filler. Once the filler is ready, apply it directly into the crack using a putty knife or scraper. Ensure that the filler completely fills the crack and slightly overflows the surface.
Sanding the Surface
After the filler has cured, typically within 24 hours, use sandpaper to smooth the surface. Start with a low-grit sandpaper and gradually move to a higher grit for a finer finish. Be careful not to sand beyond the filled area, as it may damage the surrounding acrylic surface.
Polishing for a Seamless Finish
After sanding, use a clean cloth to remove any dust or debris. Apply a high-quality acrylic polish to the repaired area and buff it gently. This will help restore the shine and create a seamless finish.
By following these simple steps, you can effectively fix a hairline crack in your acrylic bathtub. Remember to handle the repair materials with care and take necessary safety precautions. In case of any doubts or major cracks, it’s always advisable to consult a professional. Enjoy your revitalized bathtub for years to come!