Doors are an essential part of our homes, providing security, privacy, and aesthetic appeal. However, sometimes accidents or forced entries can result in a door being kicked in. This can leave homeowners feeling vulnerable and in need of immediate repair. In this article, we will guide you through the process of fixing a door that’s been kicked in, from understanding the damage to completing the repair. By following these steps, you can restore your door’s functionality and regain a sense of safety and security in your home.
Understanding the Damage
Before diving into the repair process, it’s crucial to understand the extent of the damage caused by the door being kicked in. This will help you determine the necessary repairs and materials needed.
When a door is forcefully kicked in, it can result in significant damage that goes beyond what meets the eye. The impact of the kick can cause the door to splinter, crack, or even break completely. Not only does this compromise the security of your home, but it also creates an unsightly and potentially dangerous situation.
Understanding the specific type of door you have is the first step in assessing the damage. Is it a wooden door or a metal door? This information is vital as it will influence the repair techniques and tools you will need.
Identifying the Type of Door
Wooden doors are commonly found in residential properties and are known for their aesthetic appeal and natural beauty. However, they are more susceptible to damage from forced entry. The impact of a kick can cause the wood to splinter, crack, or even break, leaving behind visible signs of destruction.
Metal doors, on the other hand, are often used in commercial buildings and offer a higher level of security. While they are more resistant to kicks and forced entry, they can still sustain damage, such as dents or bent frames, depending on the intensity of the impact.
Once you have identified the type of door, you can proceed to assess the extent of the damage. Carefully examine the door, both on the inside and outside, to determine the full scope of the destruction.
Assessing the Extent of Damage
Are there visible cracks, splinters, or holes on the door? These are common signs of damage caused by a forceful kick. The severity of these signs can vary, ranging from minor cracks to complete breakage.
Inspect the door frame as well. Often, when a door is kicked in, the frame can also sustain damage. Look for any signs of misalignment, cracks, or splintering around the frame. It’s important to assess the condition of the frame as it plays a crucial role in the overall stability and security of the door.
Understanding the scope of the damage will help you plan the necessary repairs and gather the correct tools. Depending on the severity of the damage, you may need to replace the entire door or focus on repairing specific areas. By thoroughly assessing the extent of the damage, you can ensure that your repair efforts are effective and long-lasting.
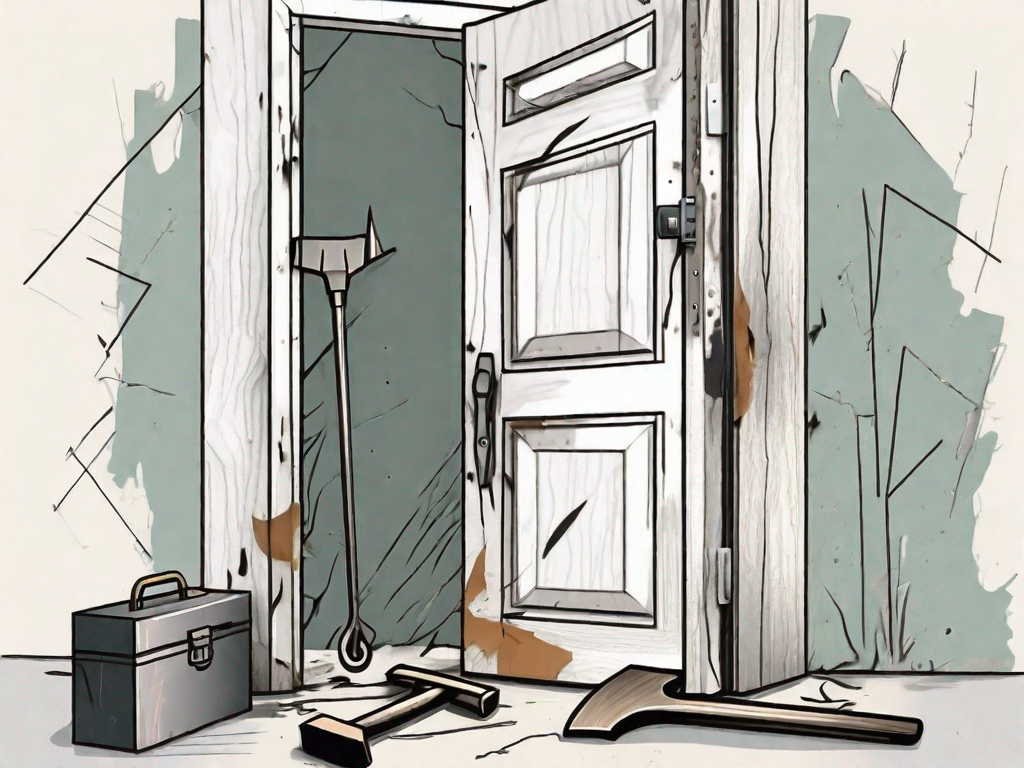
Gathering the Necessary Tools
Once you have identified the type of door and assessed the damage, it’s time to gather the necessary tools for the repair process. Having the right tools on hand will make the job easier and ensure a successful outcome. In this section, we will outline the tools needed for both wooden and metal doors, providing you with a comprehensive list to help you prepare.
Tools for Wooden Doors
For fixing a wooden door, you will need the following tools:
- Screwdriver set: A set of screwdrivers with different sizes and types of heads will come in handy for removing and installing screws.
- Hammer: A hammer is essential for various tasks, such as tapping in nails, adjusting hinges, or gently knocking parts into place.
- Wood glue: Wood glue is a strong adhesive that will help you repair any broken or loose wooden parts of the door.
- Chisel: A chisel is useful for shaping or removing wood, especially when fitting new hinges or repairing damaged areas.
- Router: A router is a power tool that can be used to create precise cuts and shapes in wood, which may be necessary for certain repairs.
- Sandpaper: Sandpaper of different grits will allow you to smooth out rough edges, remove old paint or varnish, and prepare the surface for finishing.
- Clamps: Clamps are helpful for holding parts together while the glue dries or when making adjustments to ensure a tight fit.
- Paint or varnish (optional): If you wish to restore the appearance of the door, you may want to have paint or varnish on hand to match the existing finish or give it a fresh look.
Tools for Metal Doors
If your door is made of metal, you will need the following tools:
- Power drill: A power drill is essential for making holes in metal and driving screws.
- Drill bits: You’ll need a set of drill bits specifically designed for metal to ensure clean and precise holes.
- Screwdriver set: Just like with wooden doors, a set of screwdrivers will be necessary for removing and installing screws.
- Hammer: A hammer can be used to adjust hinges, align metal parts, or gently tap out dents.
- Metal screws: Metal screws are designed to securely fasten metal parts together and are essential for repairing a metal door.
- Metal putty: Metal putty is a filler material that can be used to repair small holes, cracks, or dents in metal doors.
- Metal file: A metal file is a tool used for shaping and smoothing metal surfaces, ensuring a professional finish.
- Sandpaper: Sandpaper of different grits will help you remove rust, smooth out rough edges, and prepare the surface for painting or refinishing.
- Spray paint (optional): If you want to restore the door’s appearance or give it a new color, having spray paint on hand will allow you to achieve a smooth and even finish.
Now that you have a comprehensive list of tools needed for both wooden and metal doors, you can gather them before starting the repair process. Having the right tools readily available will save you time and ensure that you can complete the job efficiently.
Preparing for the Repair
Before starting the actual repair process, it’s important to take some pre-repair steps to ensure safety and efficiency.
Repairing a damaged door can be a challenging task, but with the right preparation, you can tackle it successfully. By following these steps, you’ll be able to complete the repair with confidence and achieve a professional-looking result.
Safety Measures to Consider
Prioritize your safety during the repair process. Wear safety goggles and gloves to protect your eyes and hands from any potential injuries. These protective gears will shield you from flying debris and prevent any accidental cuts or scratches.
Additionally, if necessary, use a dust mask when working with sandpaper or other materials that produce dust. This will prevent you from inhaling harmful particles and keep your respiratory system protected.
Remember, safety should always be your top priority when engaging in any repair work. Taking these precautions will ensure that you can complete the task without any accidents or injuries.
Setting Up Your Workspace
Set up a clean workspace near the damaged door area. Clear any objects or debris that may hinder your repair efforts. Having a clutter-free environment will make it easier to maneuver and focus on the task at hand.
Arrange your tools in an organized manner, ensuring that everything you need is within reach. This will save you time and effort, as you won’t have to search for tools or materials while in the middle of the repair.
Consider using a drop cloth or old sheets to protect the floor and surrounding areas from any potential damage or spills. This will help maintain cleanliness and prevent any accidental stains or scratches.
Furthermore, ensure that you have sufficient lighting in your workspace. Good lighting is essential for accurate measurements and precise work. If needed, use additional lamps or work in a well-lit area to avoid any mistakes or mishaps.
By setting up a well-organized and clean workspace, you’ll create an environment that promotes efficiency and allows you to focus solely on the repair task. This will ultimately lead to a more successful and satisfying outcome.
Repairing the Door Frame
Once you have prepared your workspace and gathered the necessary tools, it’s time to start the repair process. We will begin with fixing the door frame.
Removing the Damaged Frame
Begin by carefully removing the damaged frame from the door. Use a screwdriver and hammer to detach any screws or nails holding the frame in place. Take your time to ensure all connections are properly released.
As you remove the damaged frame, be mindful of any surrounding materials such as trim or molding. Carefully detach these elements to avoid causing further damage. Take note of the condition of the door jamb and threshold as well, as they may require attention during the repair process.
Inspect the removed frame for any signs of rot, decay, or insect damage. If you notice any of these issues, it is essential to address them before installing the new frame. Treat the affected areas with wood preservative or insecticide to prevent future damage.
Installing a New Frame
After removing the damaged frame, it’s time to install a new one. Measure the dimensions of the door opening and purchase a new frame that matches those measurements. Install the new frame by following the manufacturer’s instructions and using the appropriate tools. Secure it firmly in place with screws or nails.
Before installing the new frame, take a moment to inspect the door opening for any structural issues. Look for signs of sagging or misalignment, as these can affect the proper installation of the new frame. If necessary, use shims or additional support to ensure the door opening is level and plumb.
When installing the new frame, pay attention to the spacing and alignment. Use a level to ensure the frame is straight and square. Make any necessary adjustments before fully securing the frame in place.
Once the new frame is installed, test the door to ensure it opens and closes smoothly. Check for any gaps or misalignments that may need further adjustment. If necessary, use weatherstripping or caulk to seal any gaps between the frame and the door, improving energy efficiency and preventing drafts.
Lastly, take the time to clean up any debris or leftover materials from the repair process. Vacuum or sweep the area to remove dust, wood shavings, or any other residue. This will not only leave your workspace tidy but also help maintain the longevity of your newly repaired door frame.
Fixing the Door
With the door frame repaired, it’s now time to address the damages on the door itself.
Repairing Minor Damages
If the damages on the door are minor, such as small cracks or dents, you can use wood glue, putty, or filler to fix them. Apply the chosen material to the damaged area, following the product instructions. Allow it to dry completely, then use sandpaper to smoothen the repaired section. If desired, paint or varnish the door to give it a finished look.
Replacing the Entire Door
In cases where the damage is extensive and beyond repair, it may be necessary to replace the entire door. Measure the dimensions of the door opening to ensure a proper fit. Purchase a new door that matches your desired style and material. Follow the manufacturer’s instructions for installation, ensuring a secure and proper fit within the frame.
By following these steps, you can effectively fix a door that’s been kicked in. Remember to prioritize safety, gather the necessary tools, and take proper measurements before proceeding with the repair. With patience and attention to detail, you can restore your door’s integrity and ensure the security of your home.